


In this tutorial I’ll teach you how to draw and paint the mountain of Reine, Norway. Let’s go!
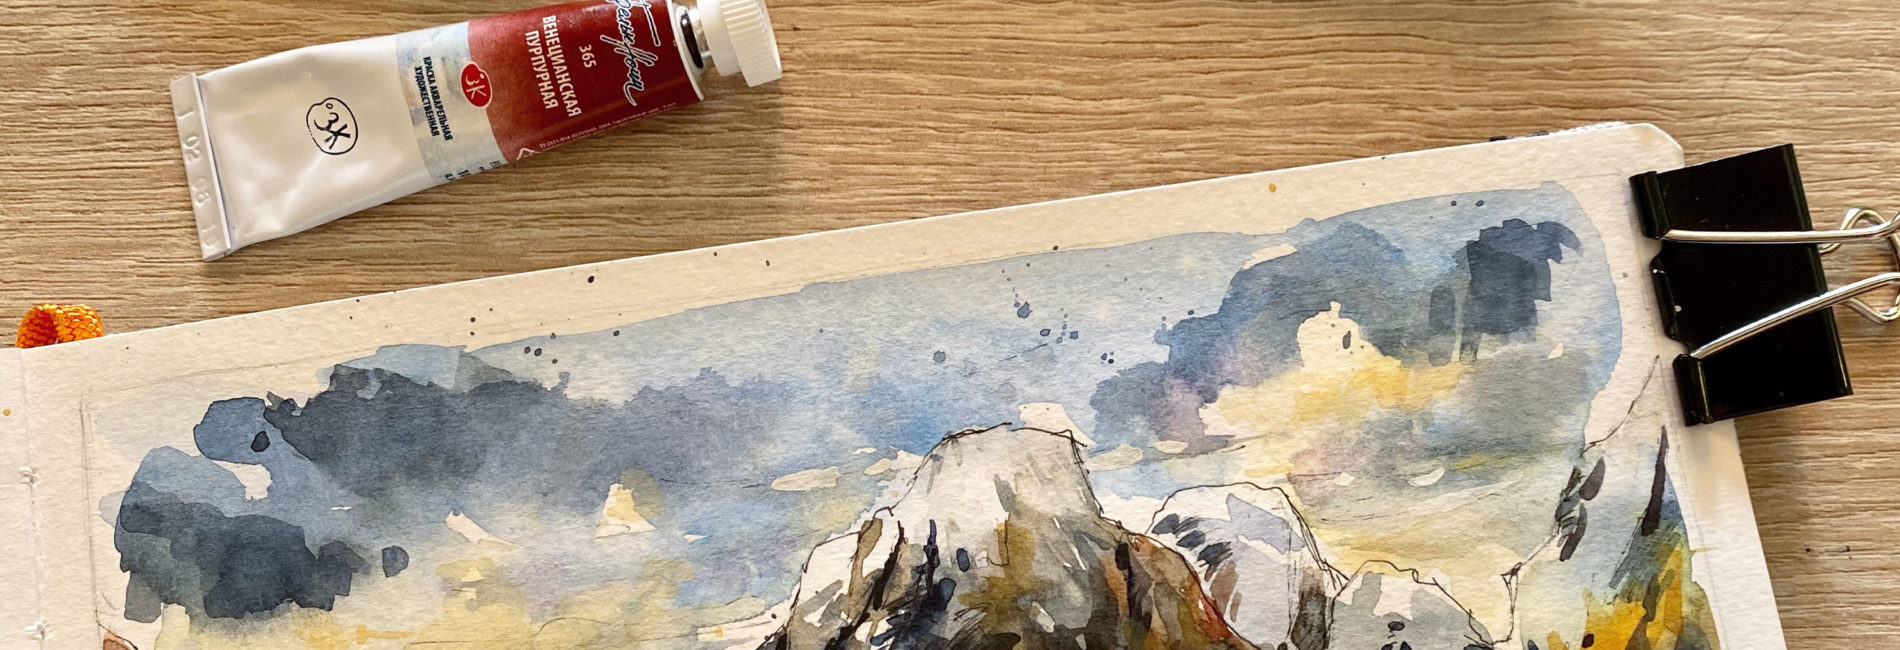
Supplies
You will need:

1 – Pencil drawing
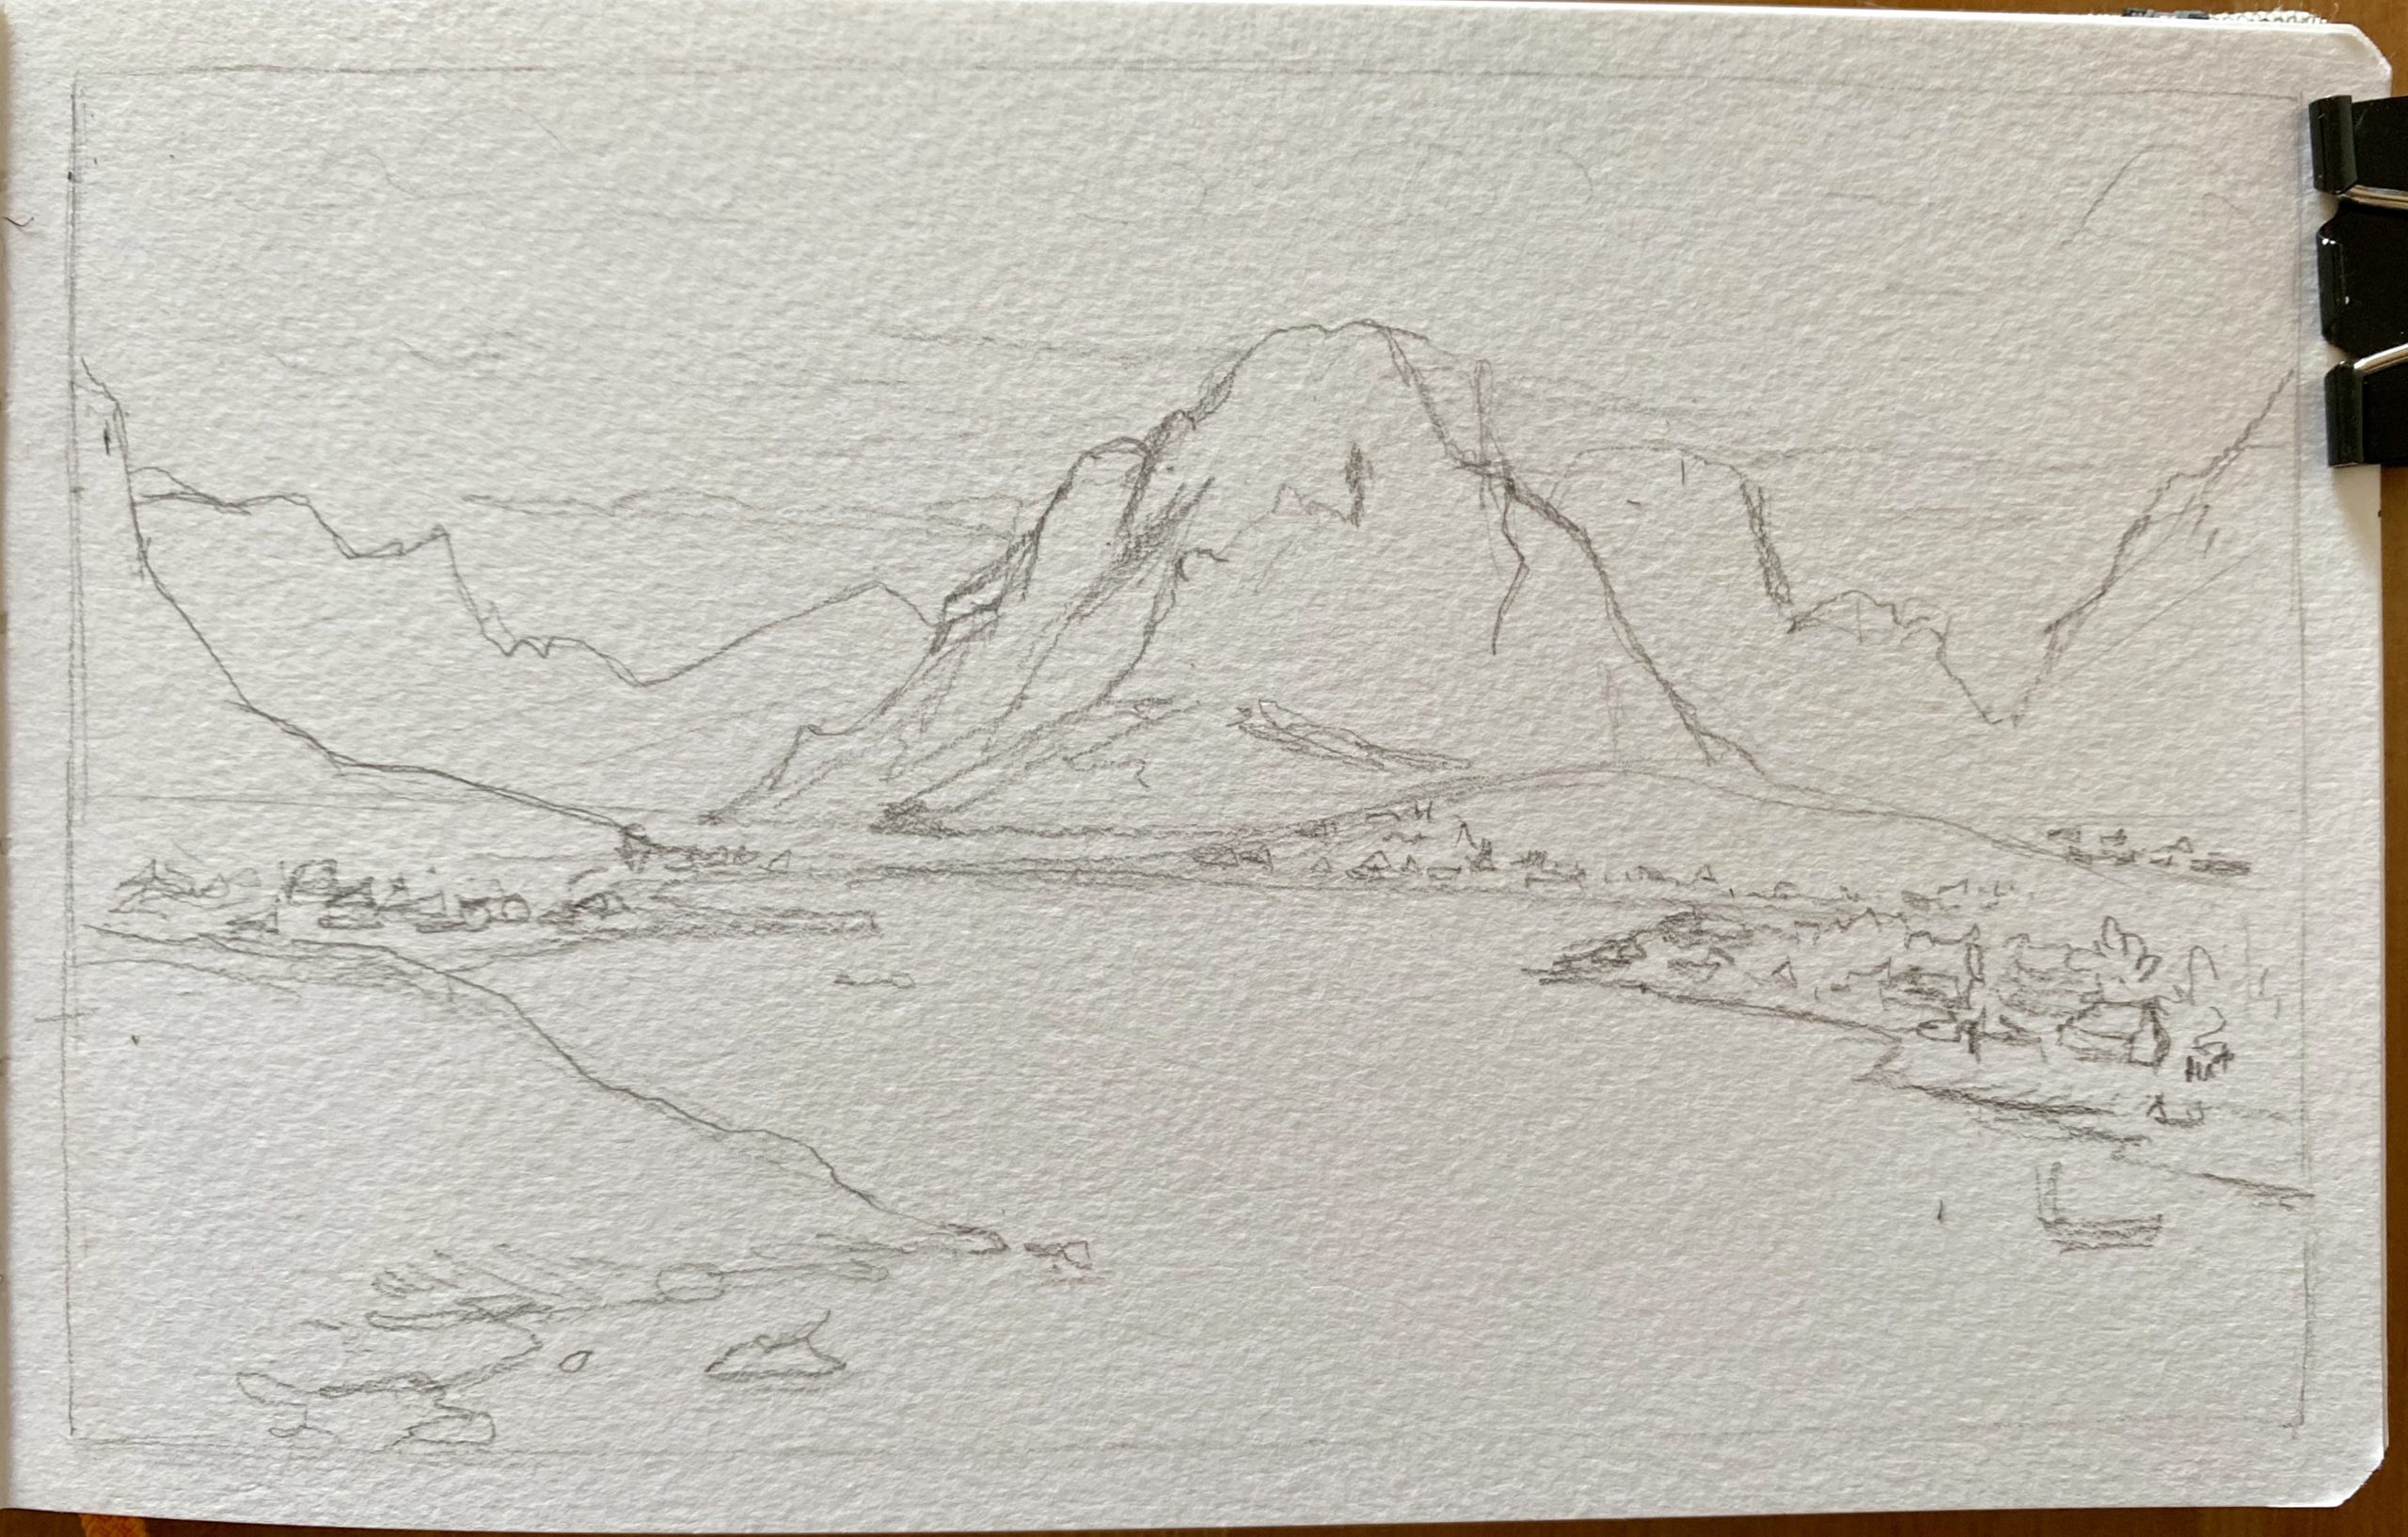
- Find and draw the horizon line: we will put all the mountains above it and the lands with cities below it
- Focus on the central mountain, the main subject of the painting. Only sketch the others and the houses and rocks.
2 – Put some ink on it
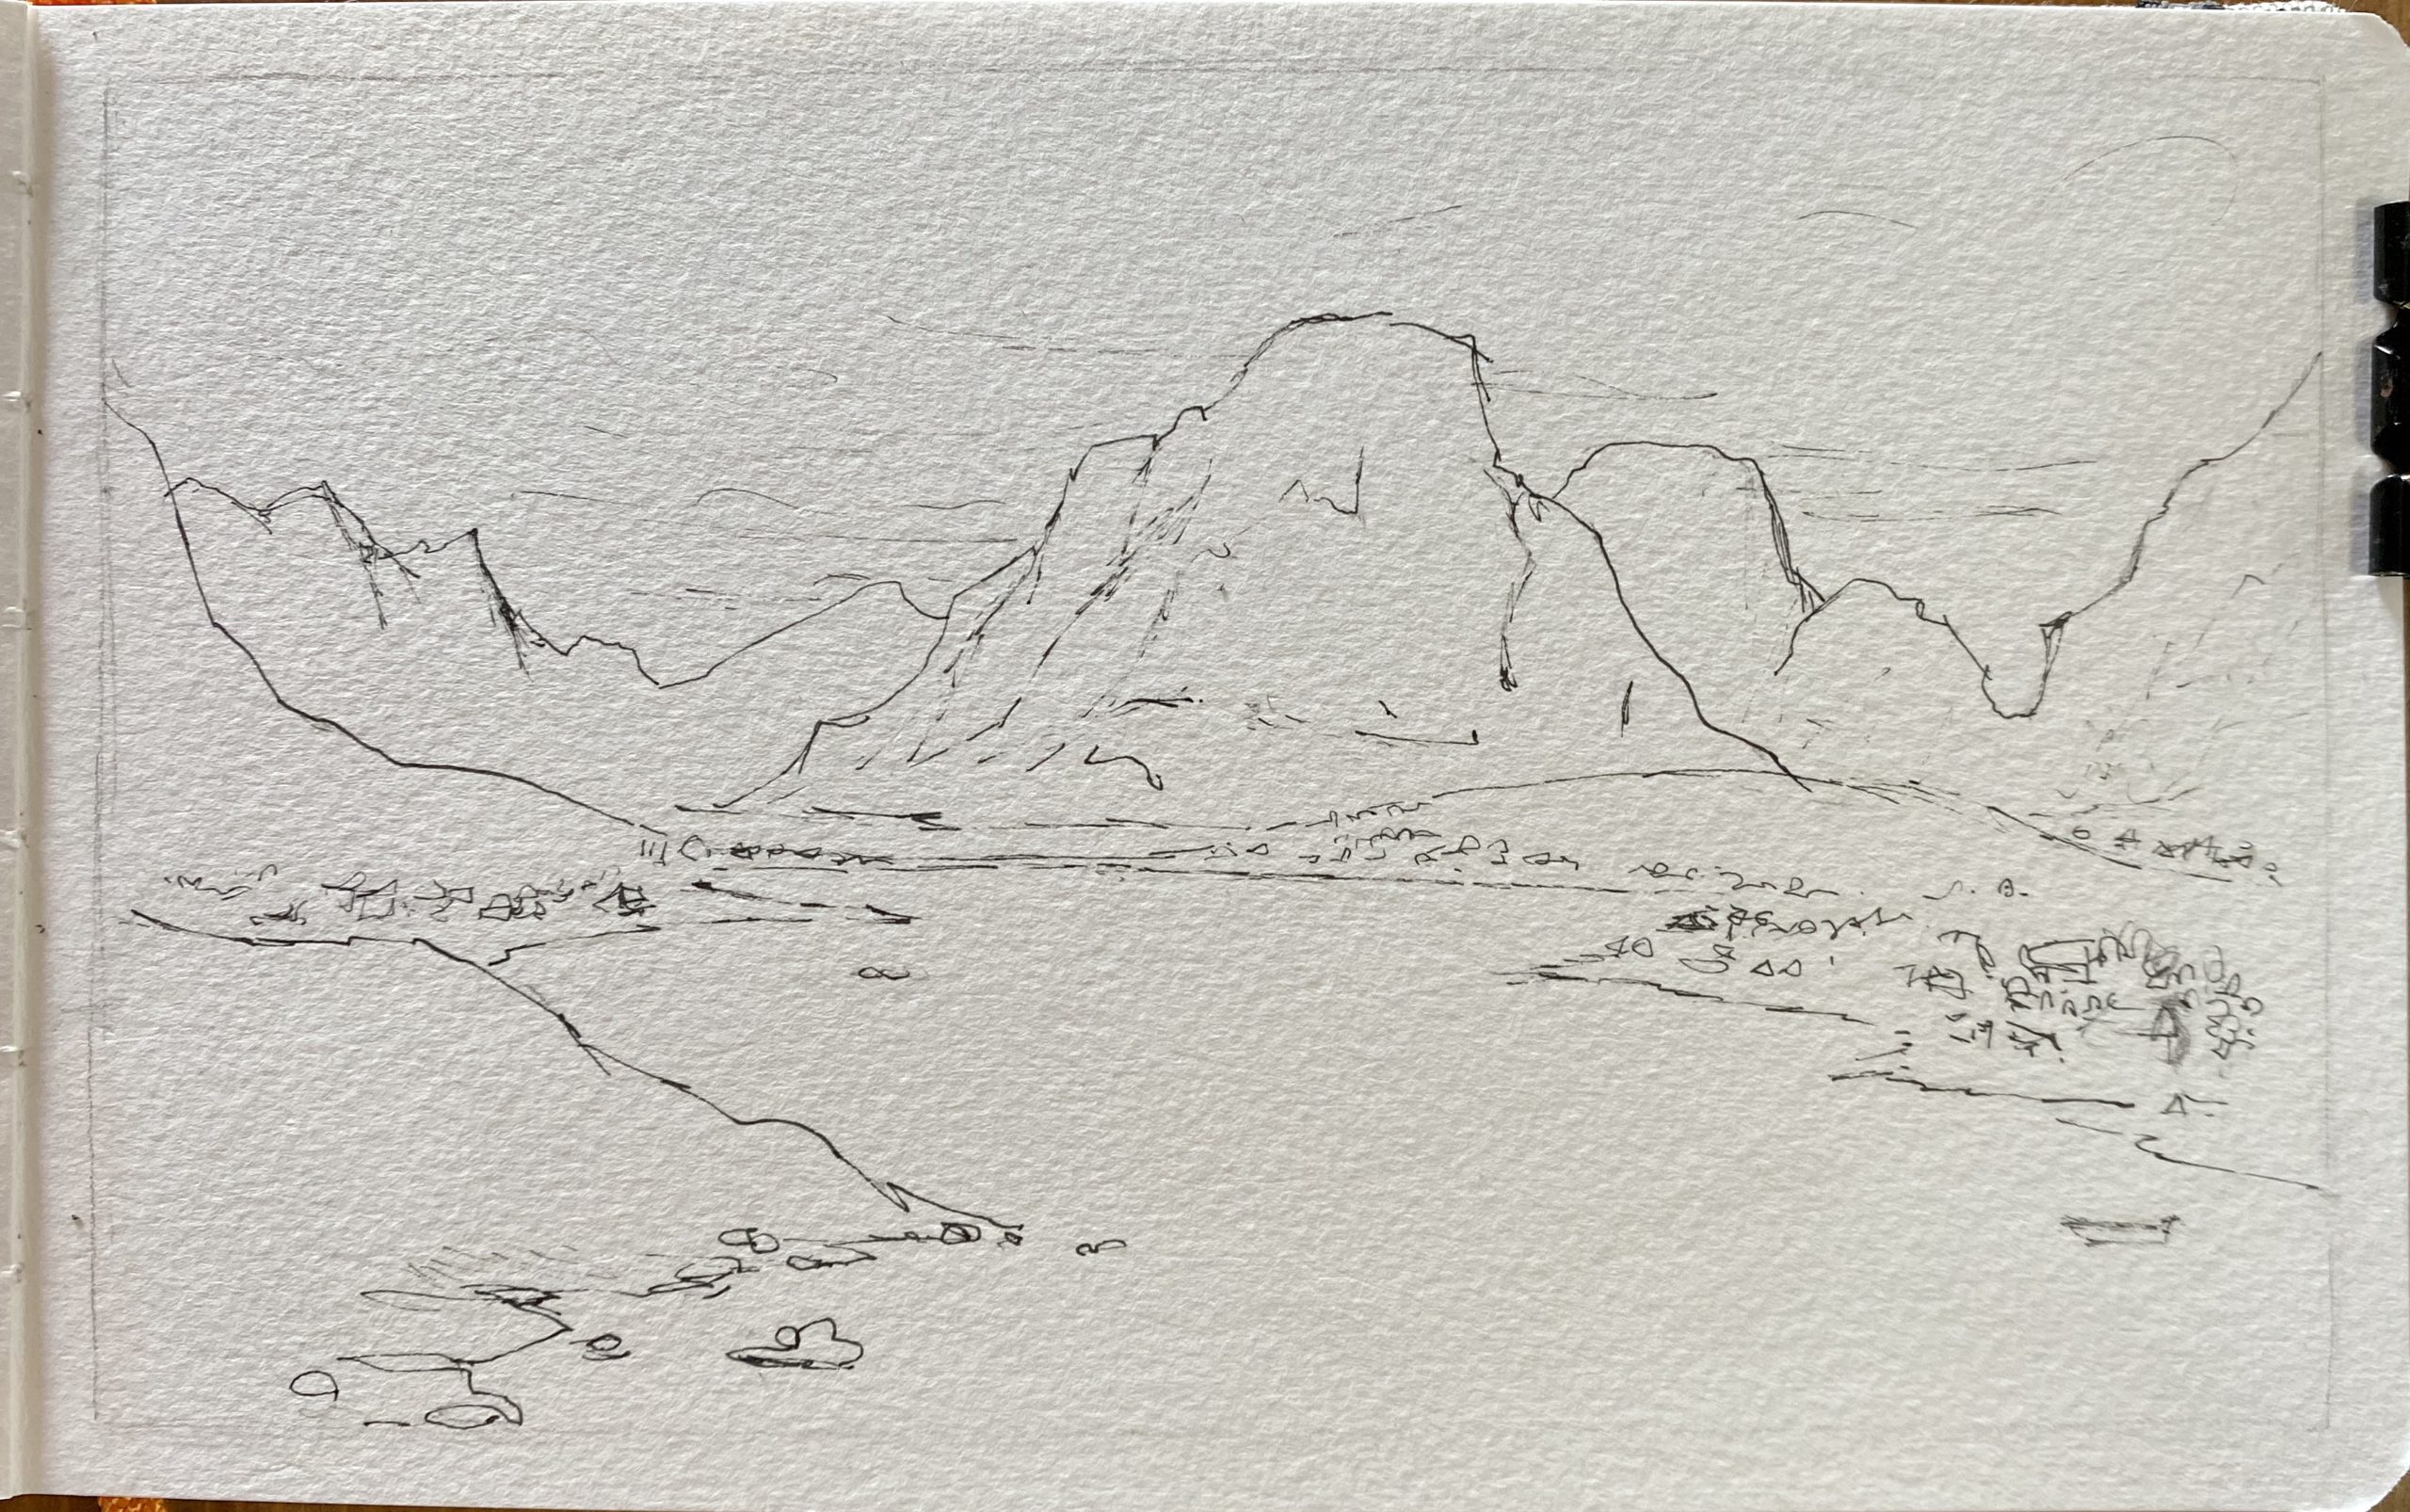
- Use the waterproof fineliners and go over the pencil.
- Keep the idea of the previous pencil drawing and let this step be sketchy and not super detailed, just visualize the spaces.
- Only on the central mountain you should go and add lines representing the structure of it.
3 – Sky and first layer of the water
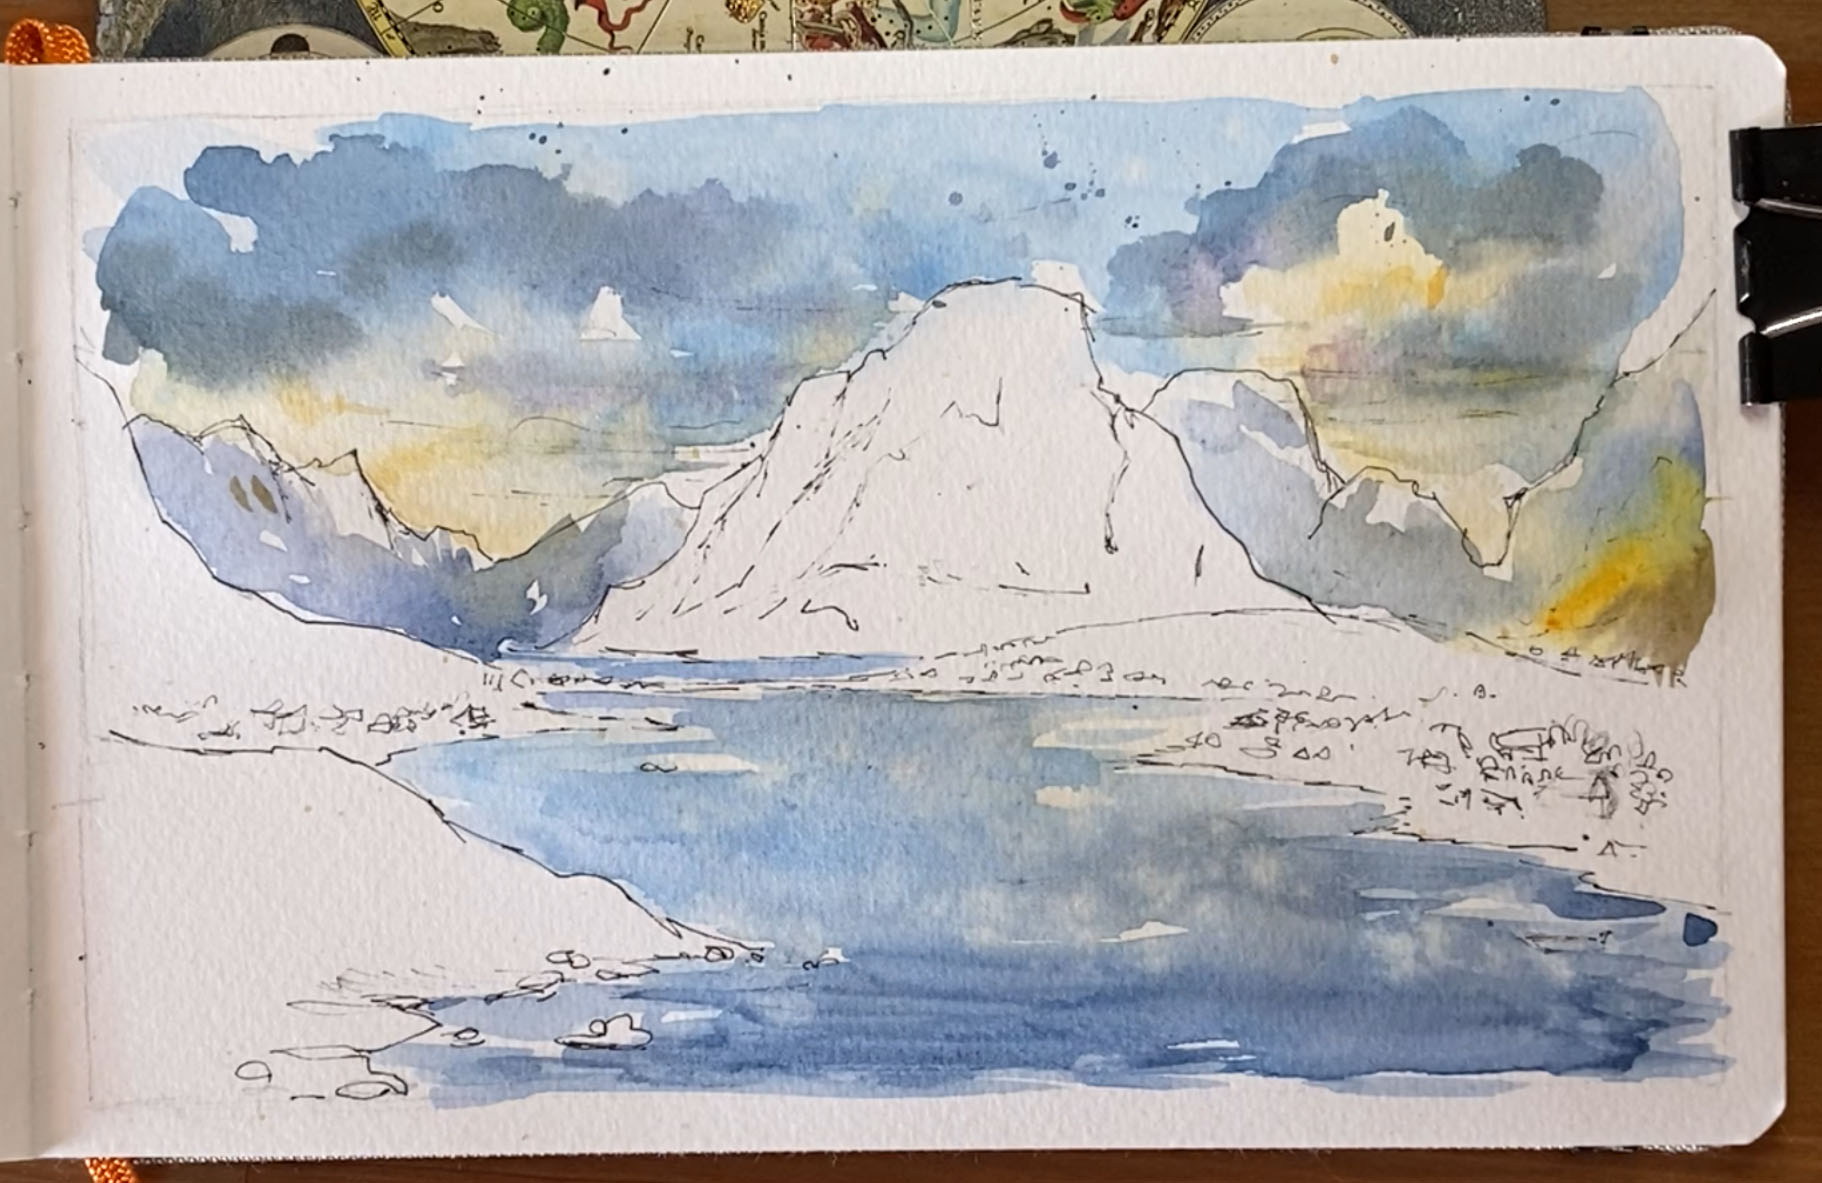
- I’m only going to use a round brush number 12 and the number 4 for the details.
- Paint the sky first with the orange yellow and then with some blue, leaving white spaces. Keep the washes watery.
- When it almost dries, with the number 4 brush and indigo go over some part of the sky, forming clouds with the technique of negative space (I refer to the top right corner of the page).
- Tip: don’t think too much or ask yourself “where should I put the next cloud?”. It will ruin the spontaneity of the marks.
- Fill the water area with the same colors of the sky. First with orange/yellow (veeery watery) and then with some blue. Splatter clear water on it while it is still wet to create the reflexes.
- With the same colors go over the distant mountains.
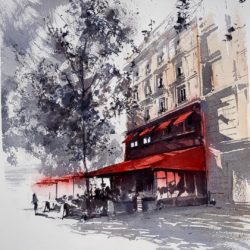
4 – Mountains and lands
- Using gray ( like Ultramarine+Burnt Sienna) , indigo and burnt umber paint the main mountain. Leave the cape white.
- Use earth tones to paint the lands areas with some dense and darker spots here and there.
- When it is dry, start to add details with ink in the bottom left land (both in white and in black). Add rocks and vegetation.
- Intensify the dark blue in the foreground water with some horizontal brushstrokes.
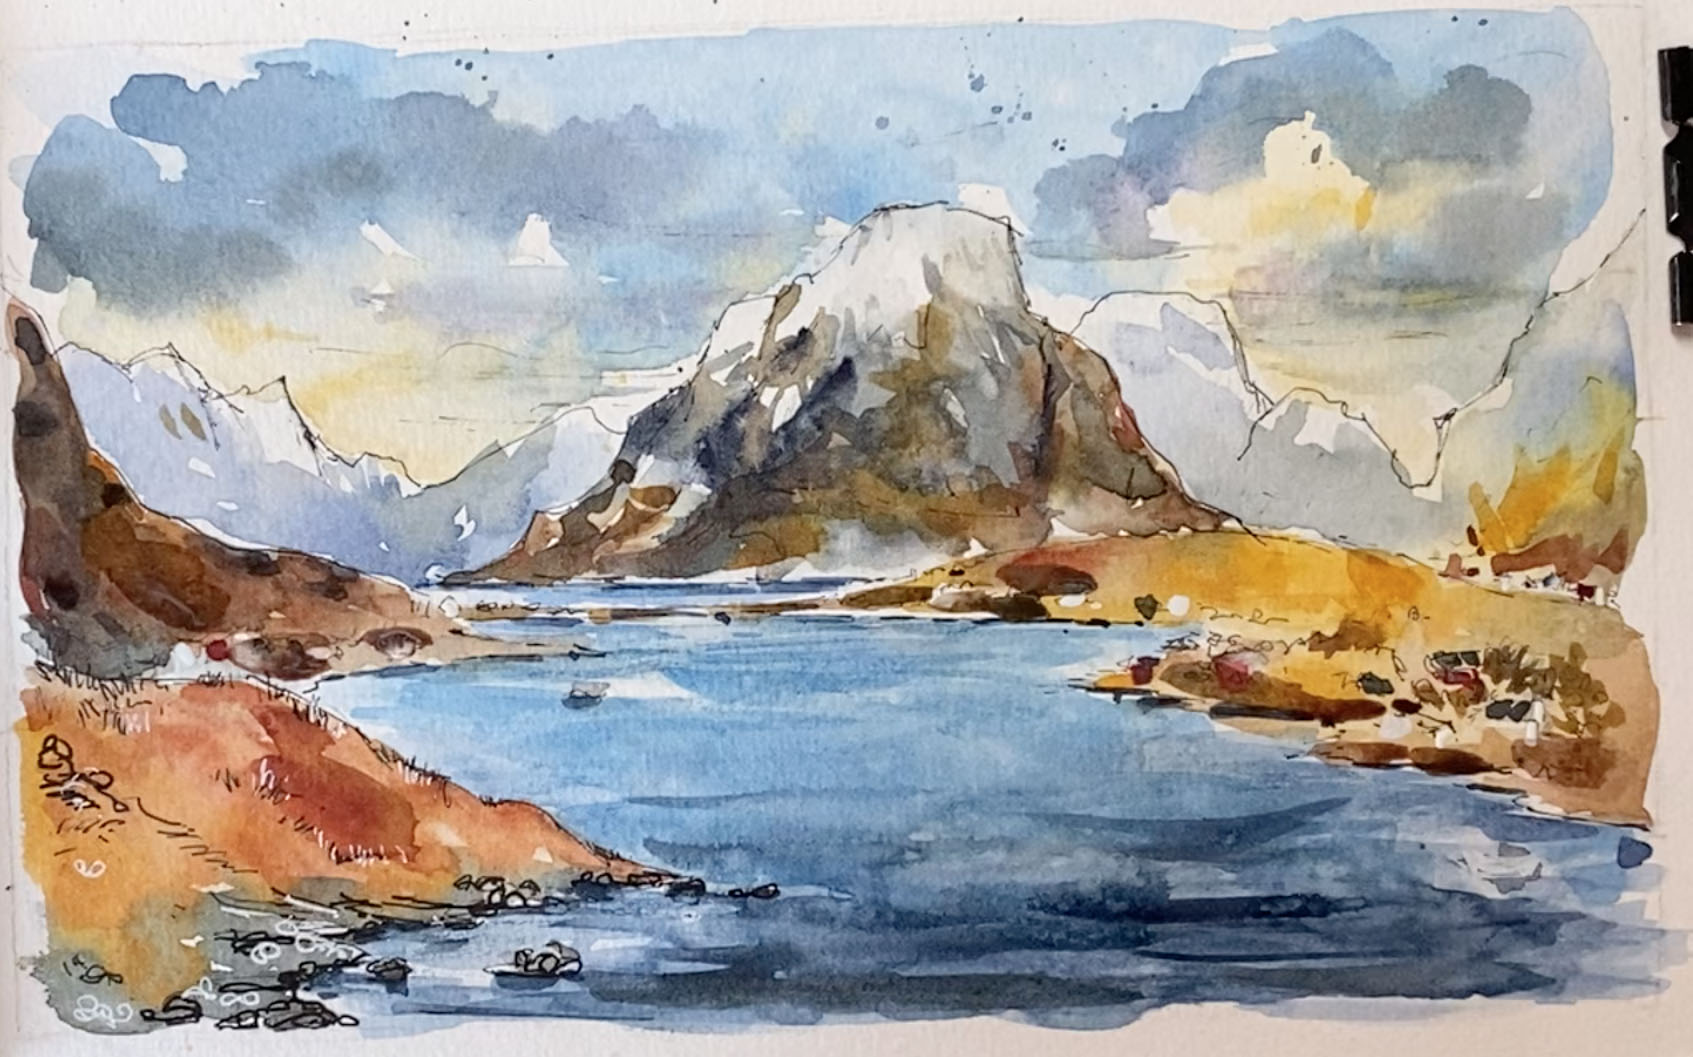
5 – Go deep in details and finish the piece
- Now the fun part: add a loooot of details! Here I spent most of the time.
- Use reds and indigo to paint some roofs here and there, some big and some other small. Cluster some buildings to create cities. Do not try to reproduce every single house you see in the photo. I also used some white gouache to create space for the houses.
- Intensify the dark areas of the main subject with both watercolor and ink. I use rapid and repeated marks.
- Do the same here and there on the lands and the distant mountains but do not overwork it.
- Splatter white gouache and indigo on the water.
As for the previous tutorial, here’s the timelapse video!
Now take a picture of your amazing painting and, if you like, post it on social media!
Remember to tag me on Instagram (do it on the photo, not in the caption! This way I won’t miss it) with @chiaramazzetti.art and put the hashtag #chiaramazzettitutorial.
I’d love to see what you create!
Happy painting!
Chiara
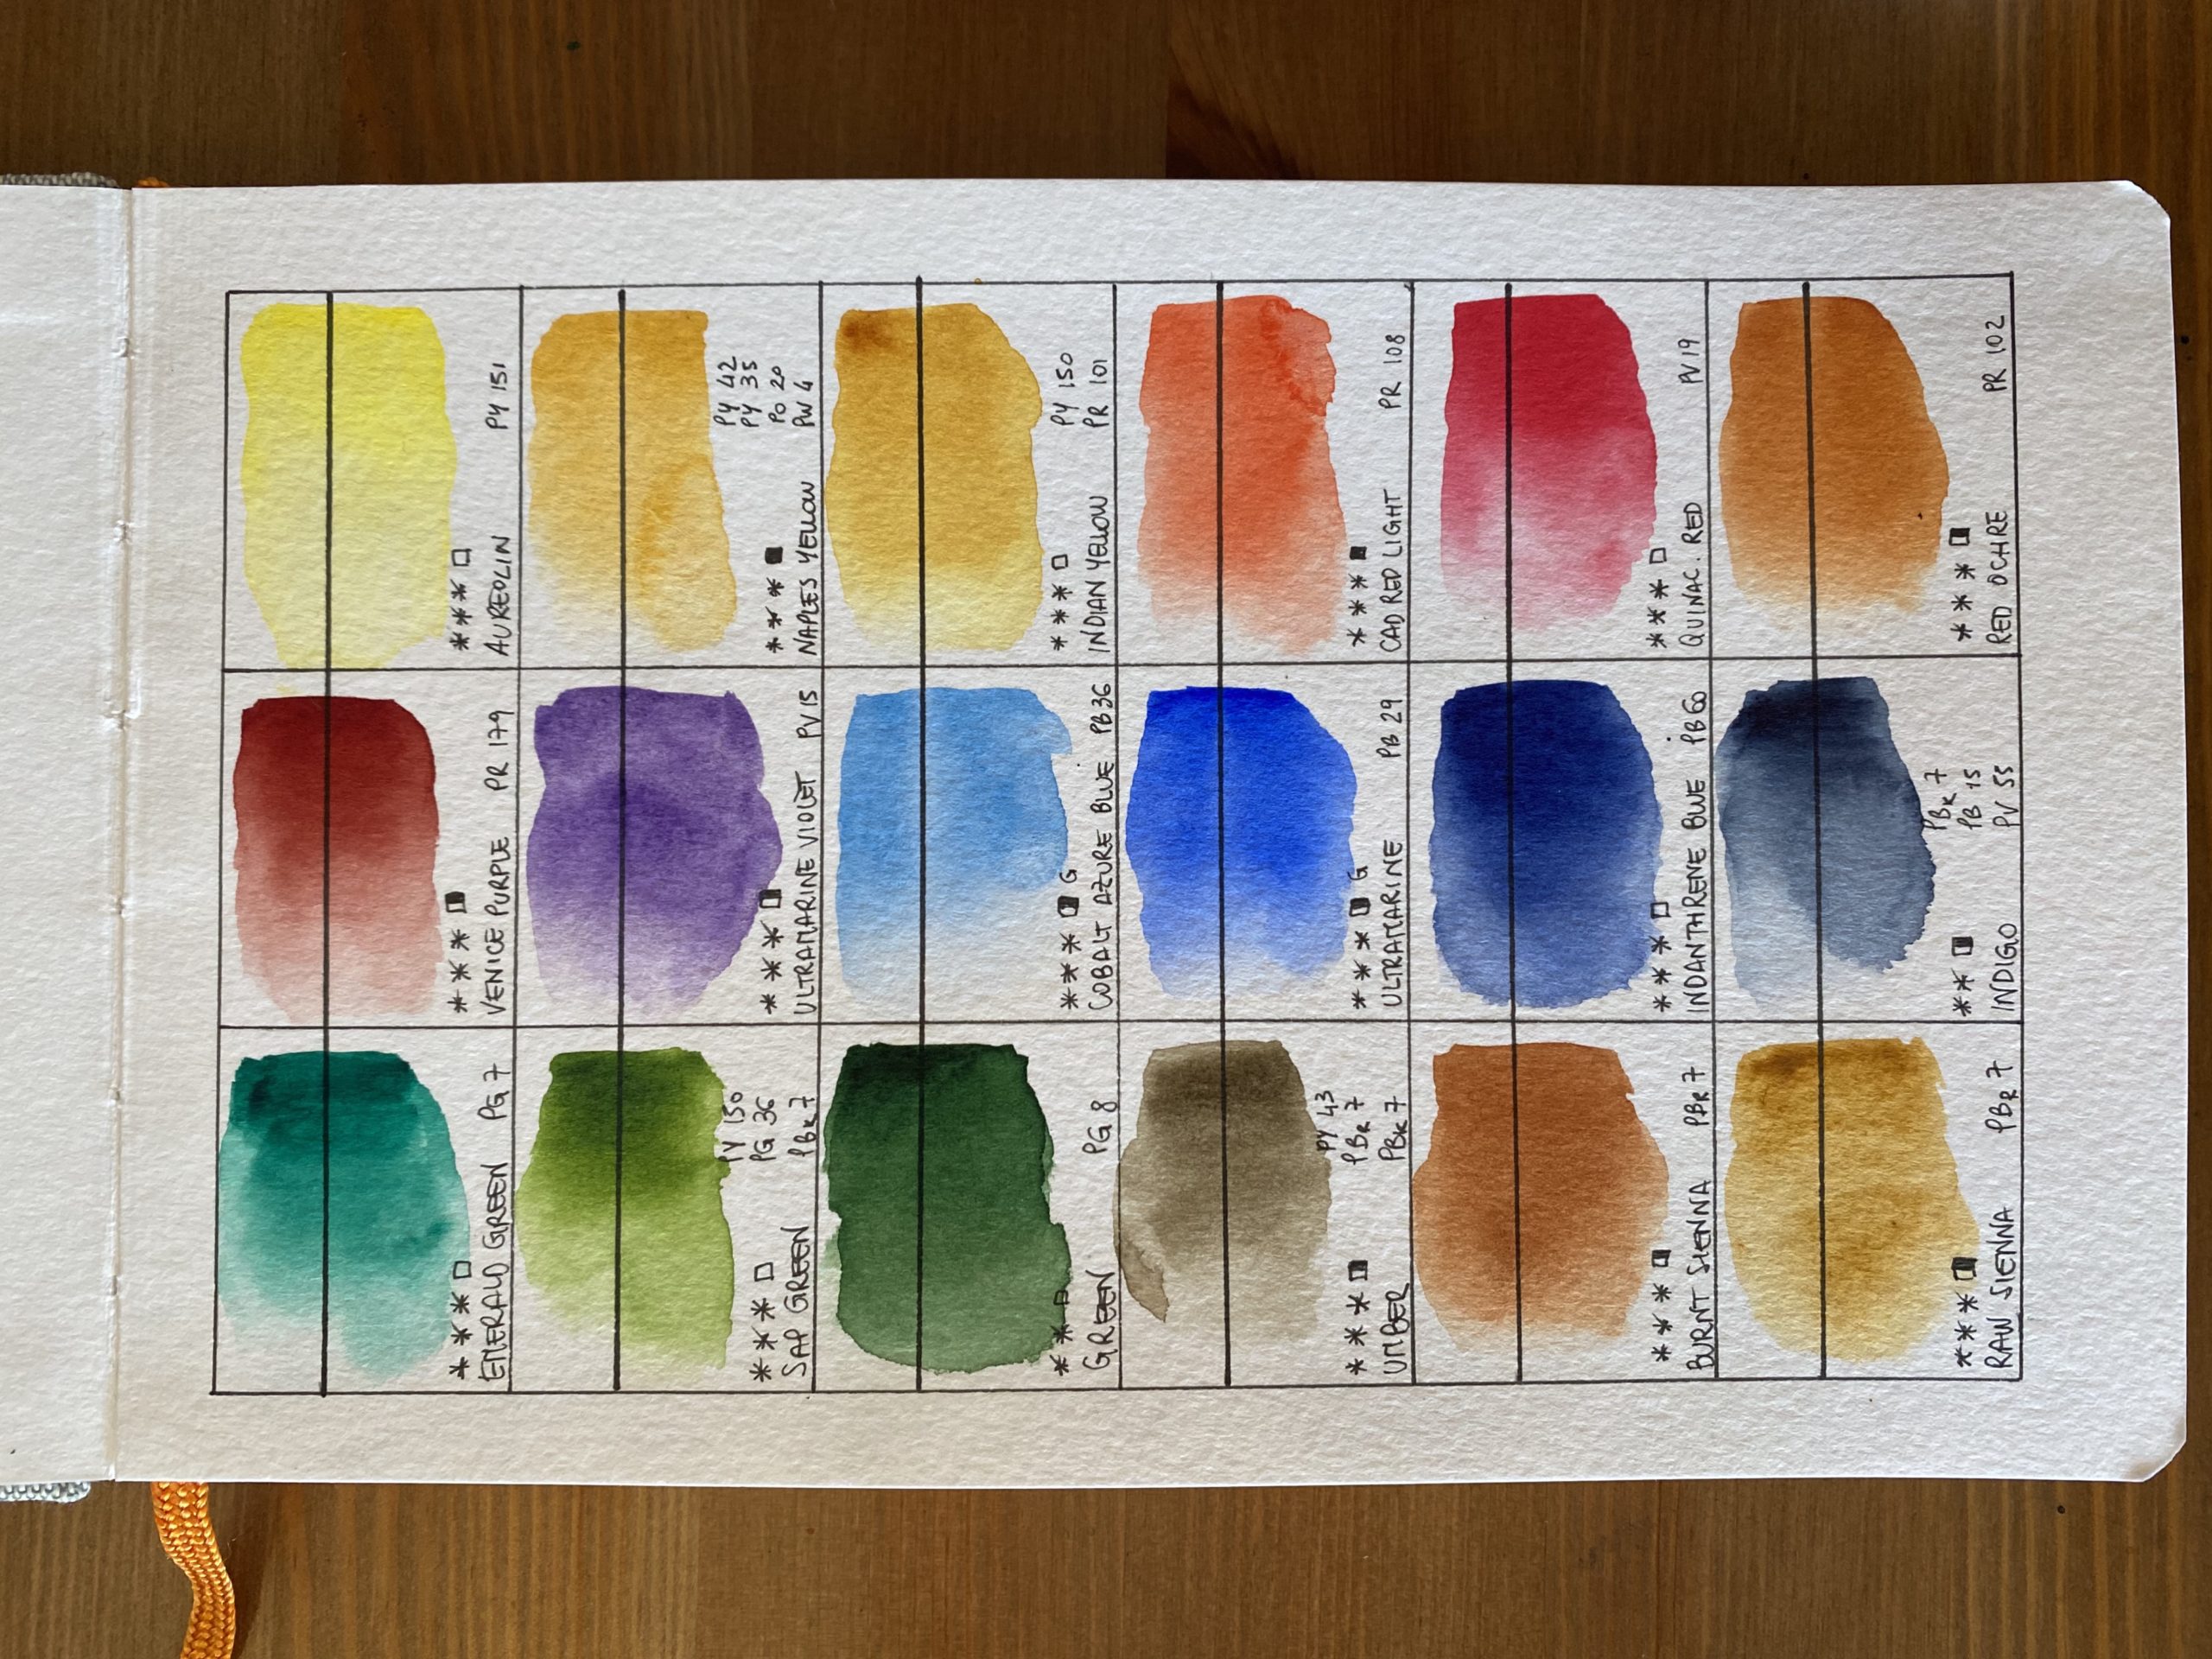
List of watercolors (based on the brand i used for this painting: White Nights Nevskaya Palitra)
Kim
Thanks for such a great tutorial. I tagged you on my IG post. I have recently started taking a travel journal with me when I hike and want to do more on location sketching. This little exercise was great practice for me. Do you have any favorite sketch books you prefer using?
Chiara Mazzetti
Hello Kim! I saw your post on IG, you did a wonderful painting 🙂 Currently I’m using the sketchbook made by “handbook journal” (I bought it online from Jackson’s). It’s about an a5 size with cold pressed watercolor paper.
Robert Lang
Great tutorial. I really picked up several ideas and help in my work. On your swatch page, what are the asterisks and boxes for? The ASTM information I understand, but the asterisks and boxes, some boxes partially filled in, is new to me. Do the boxes indicate the transparency of the paint? By the way, I really like the finished piece.
Chiara Mazzetti
Hi Robert, thanks a lot for your comment! The asterisks are there to signal the lightfastness of a color.
Regarding the boxes you got it right, it’s about transparency.
I’m happy this tutorial could help you!