


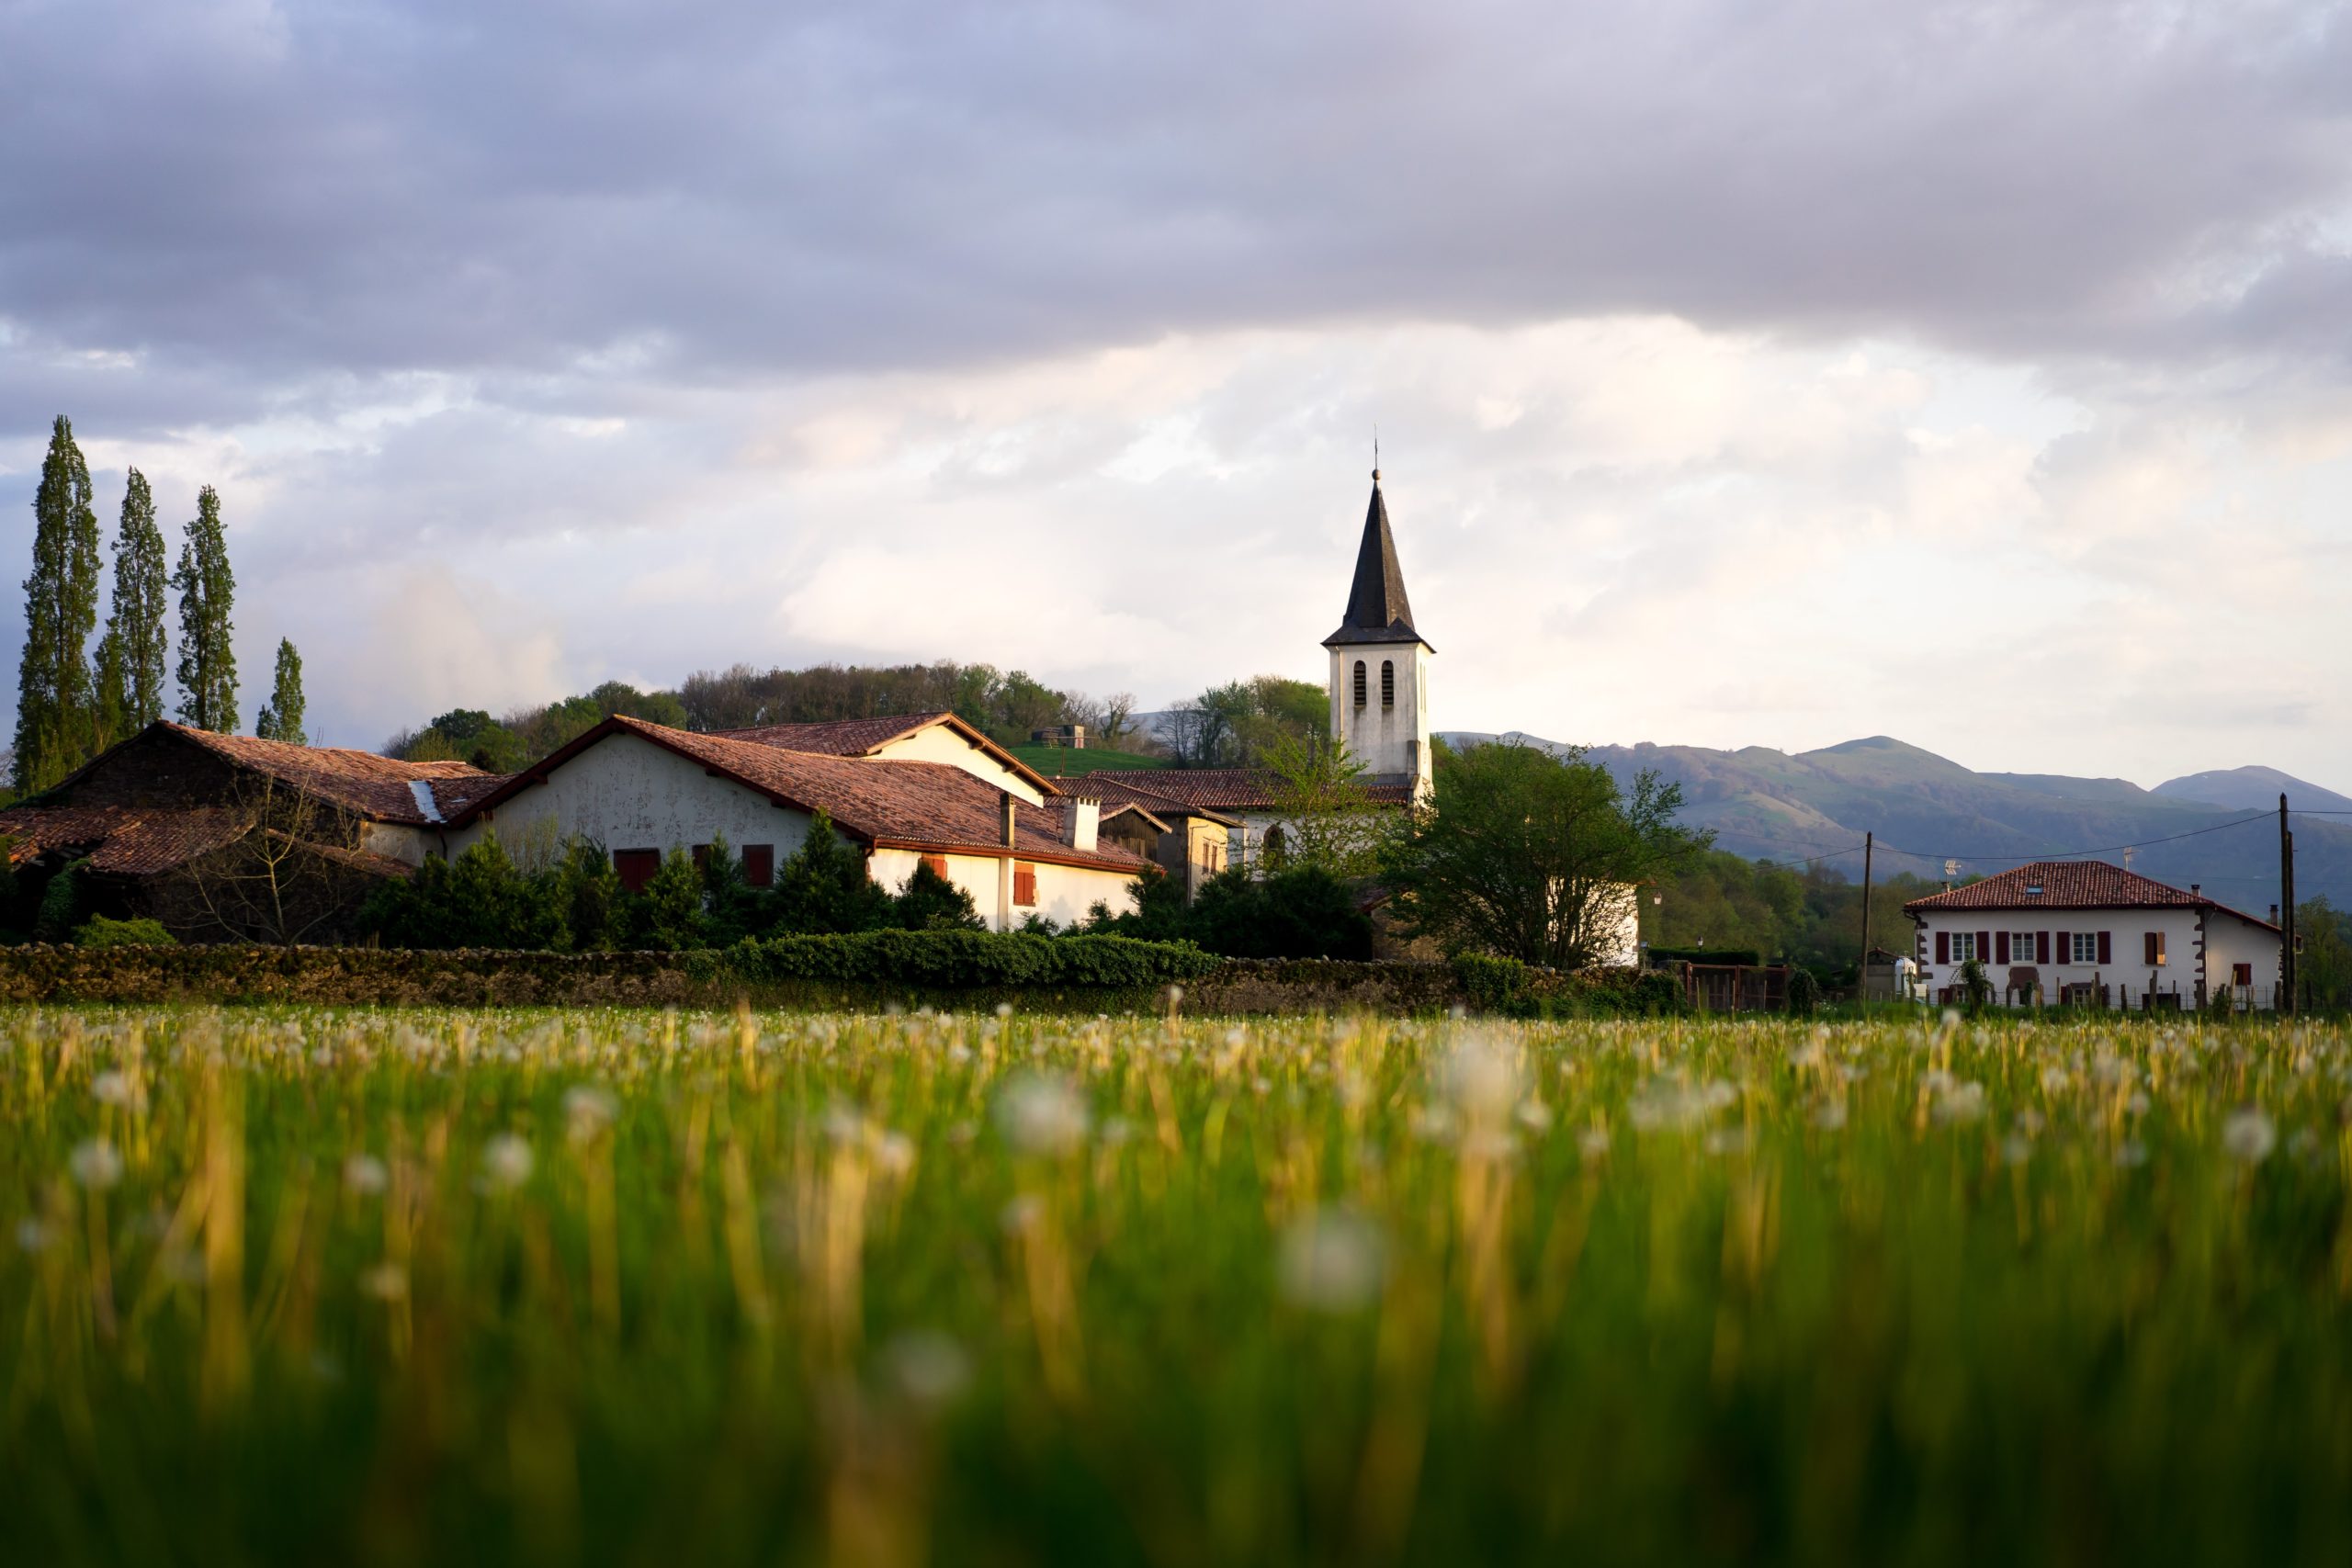
In today’s tutorial you will learn how to draw and paint in watercolor a beautiful French landscape from a photo reference.
PS. there is a surprise for you at the end of the post..!
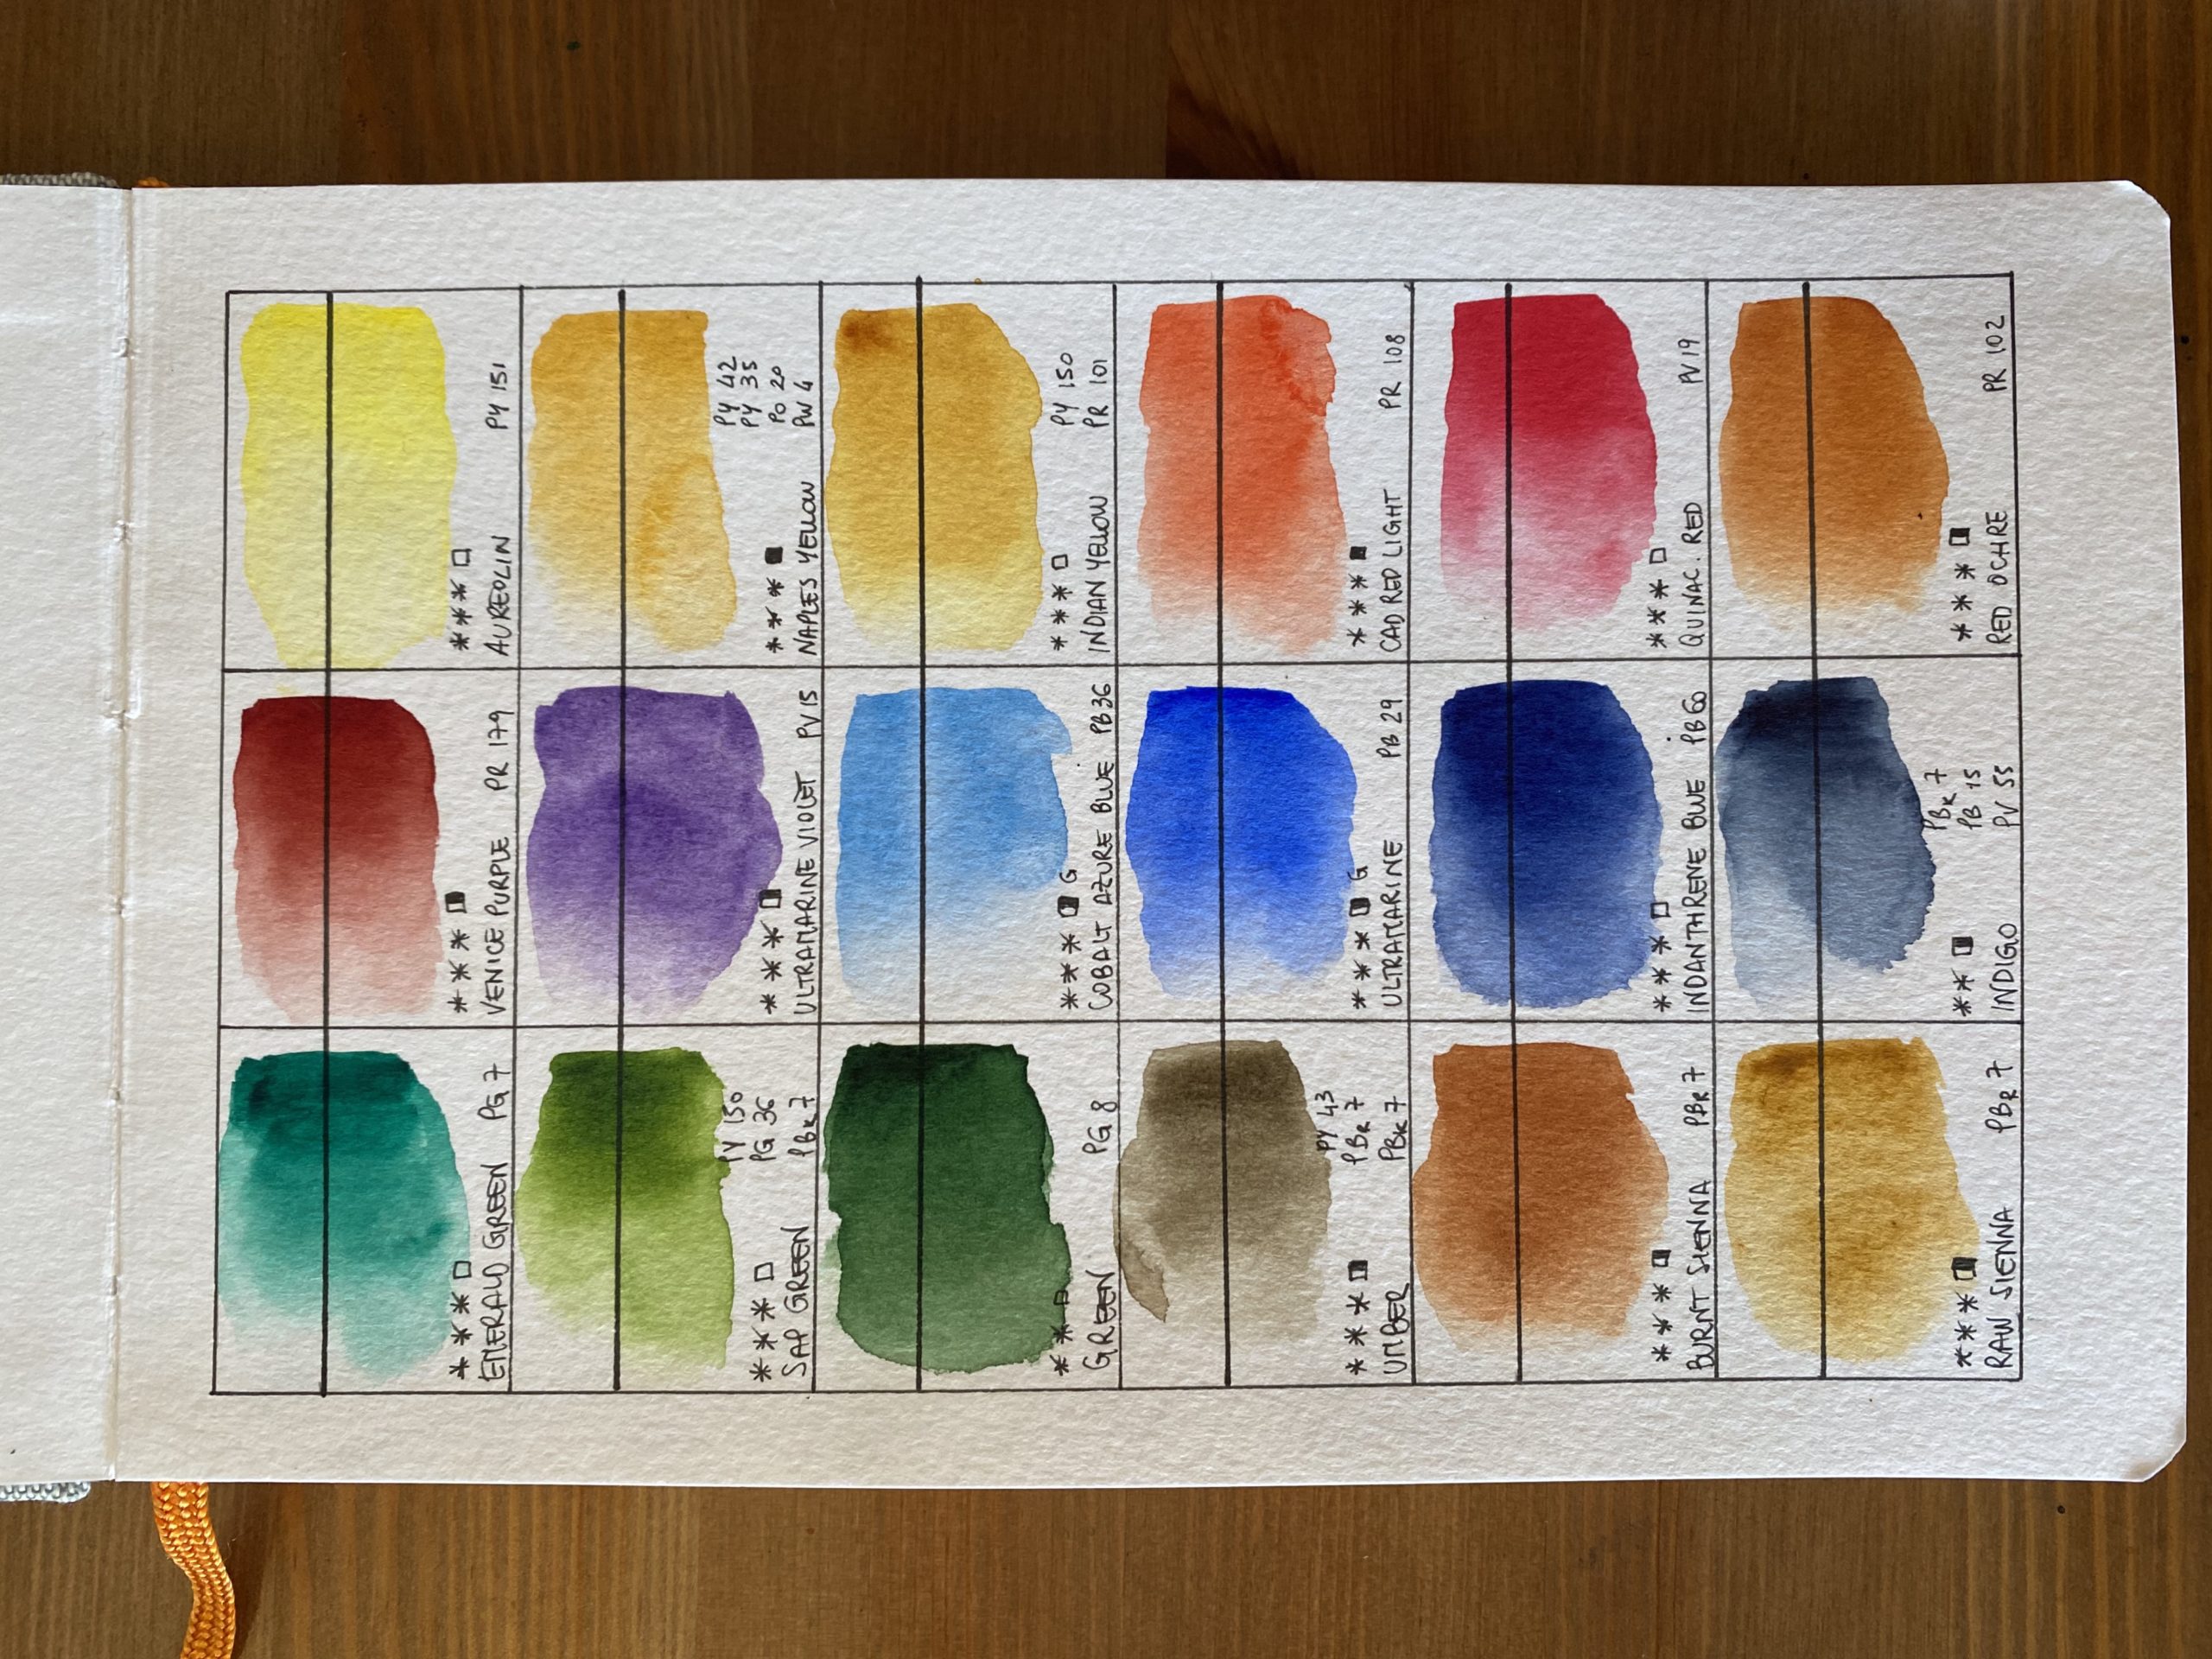
Supplies
You will need:
1 – The Sketch
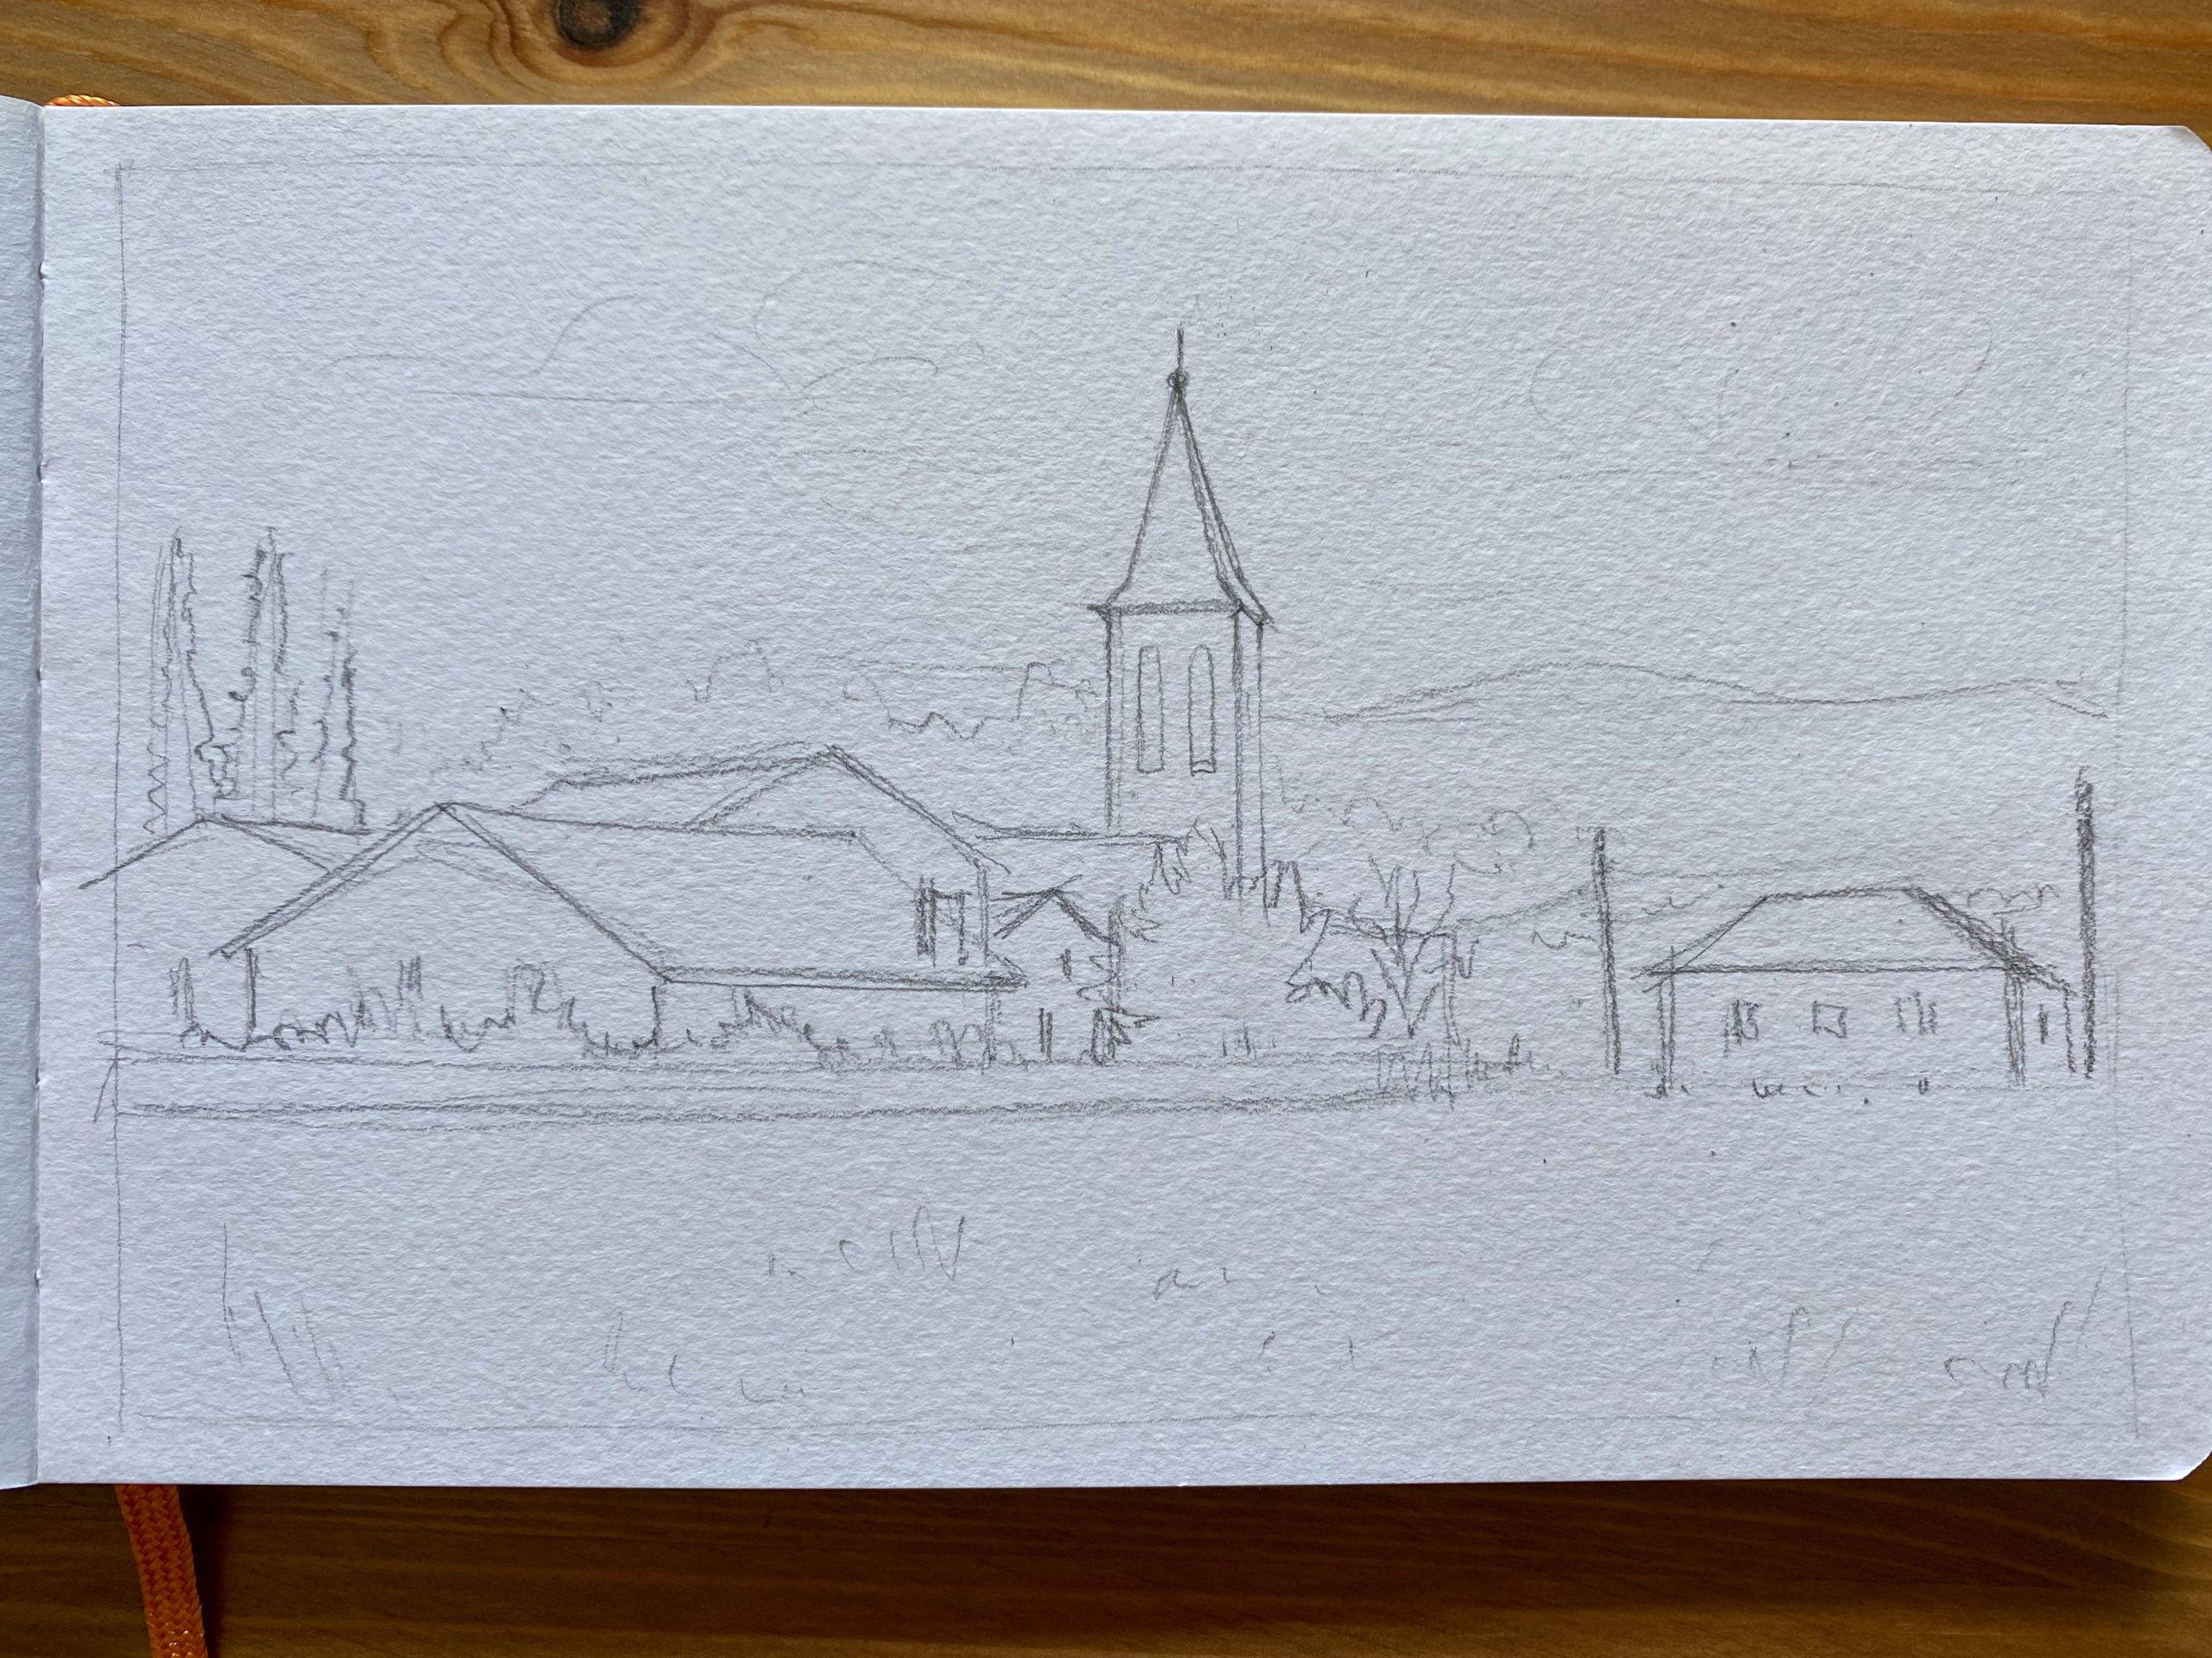
- Draw the outlines of the main subjects, the houses and the bell tower.
- Only sketch the mountains in the distance, the trees and the grass in the foreground.
- At this stage look for correct perspective and construction of the buildings.
2 – Ink
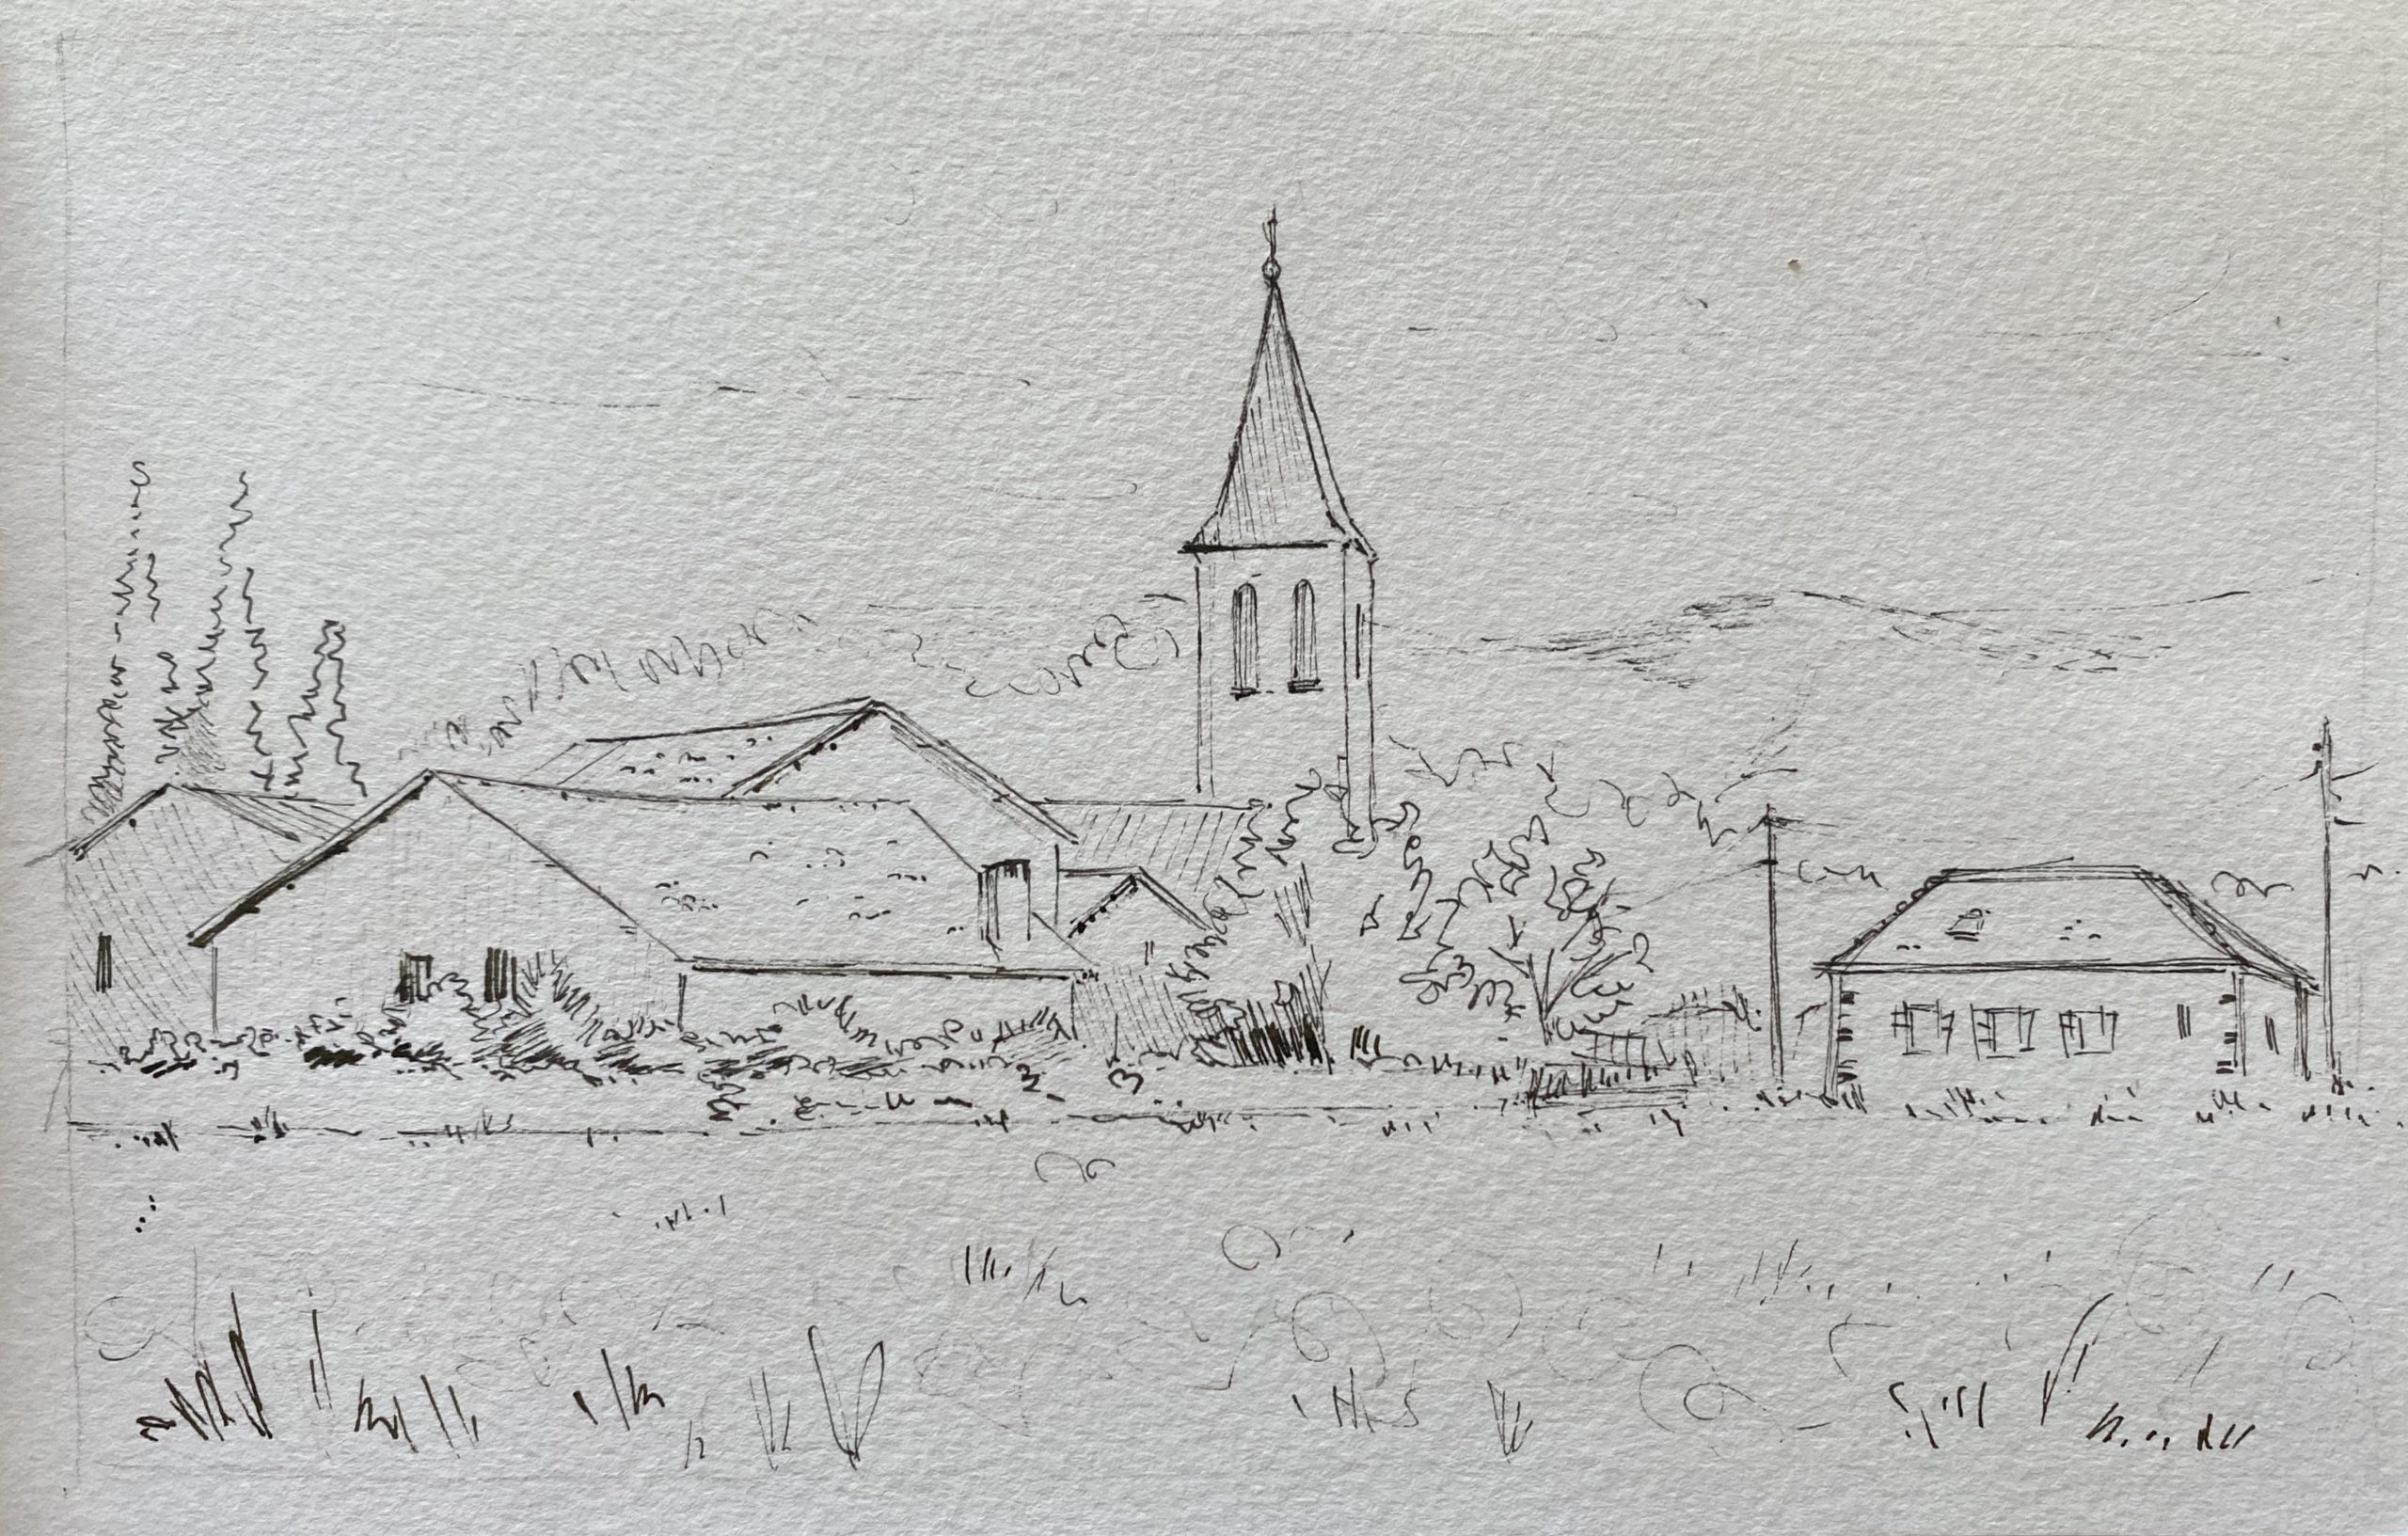
- Go over your pencil adding more details using a fineliner 0.5/0.1
- Draw the texture of the walls, roofs, trees and more
- Remember to change the thickness of the lines quite often
3 – Sky and Greenery
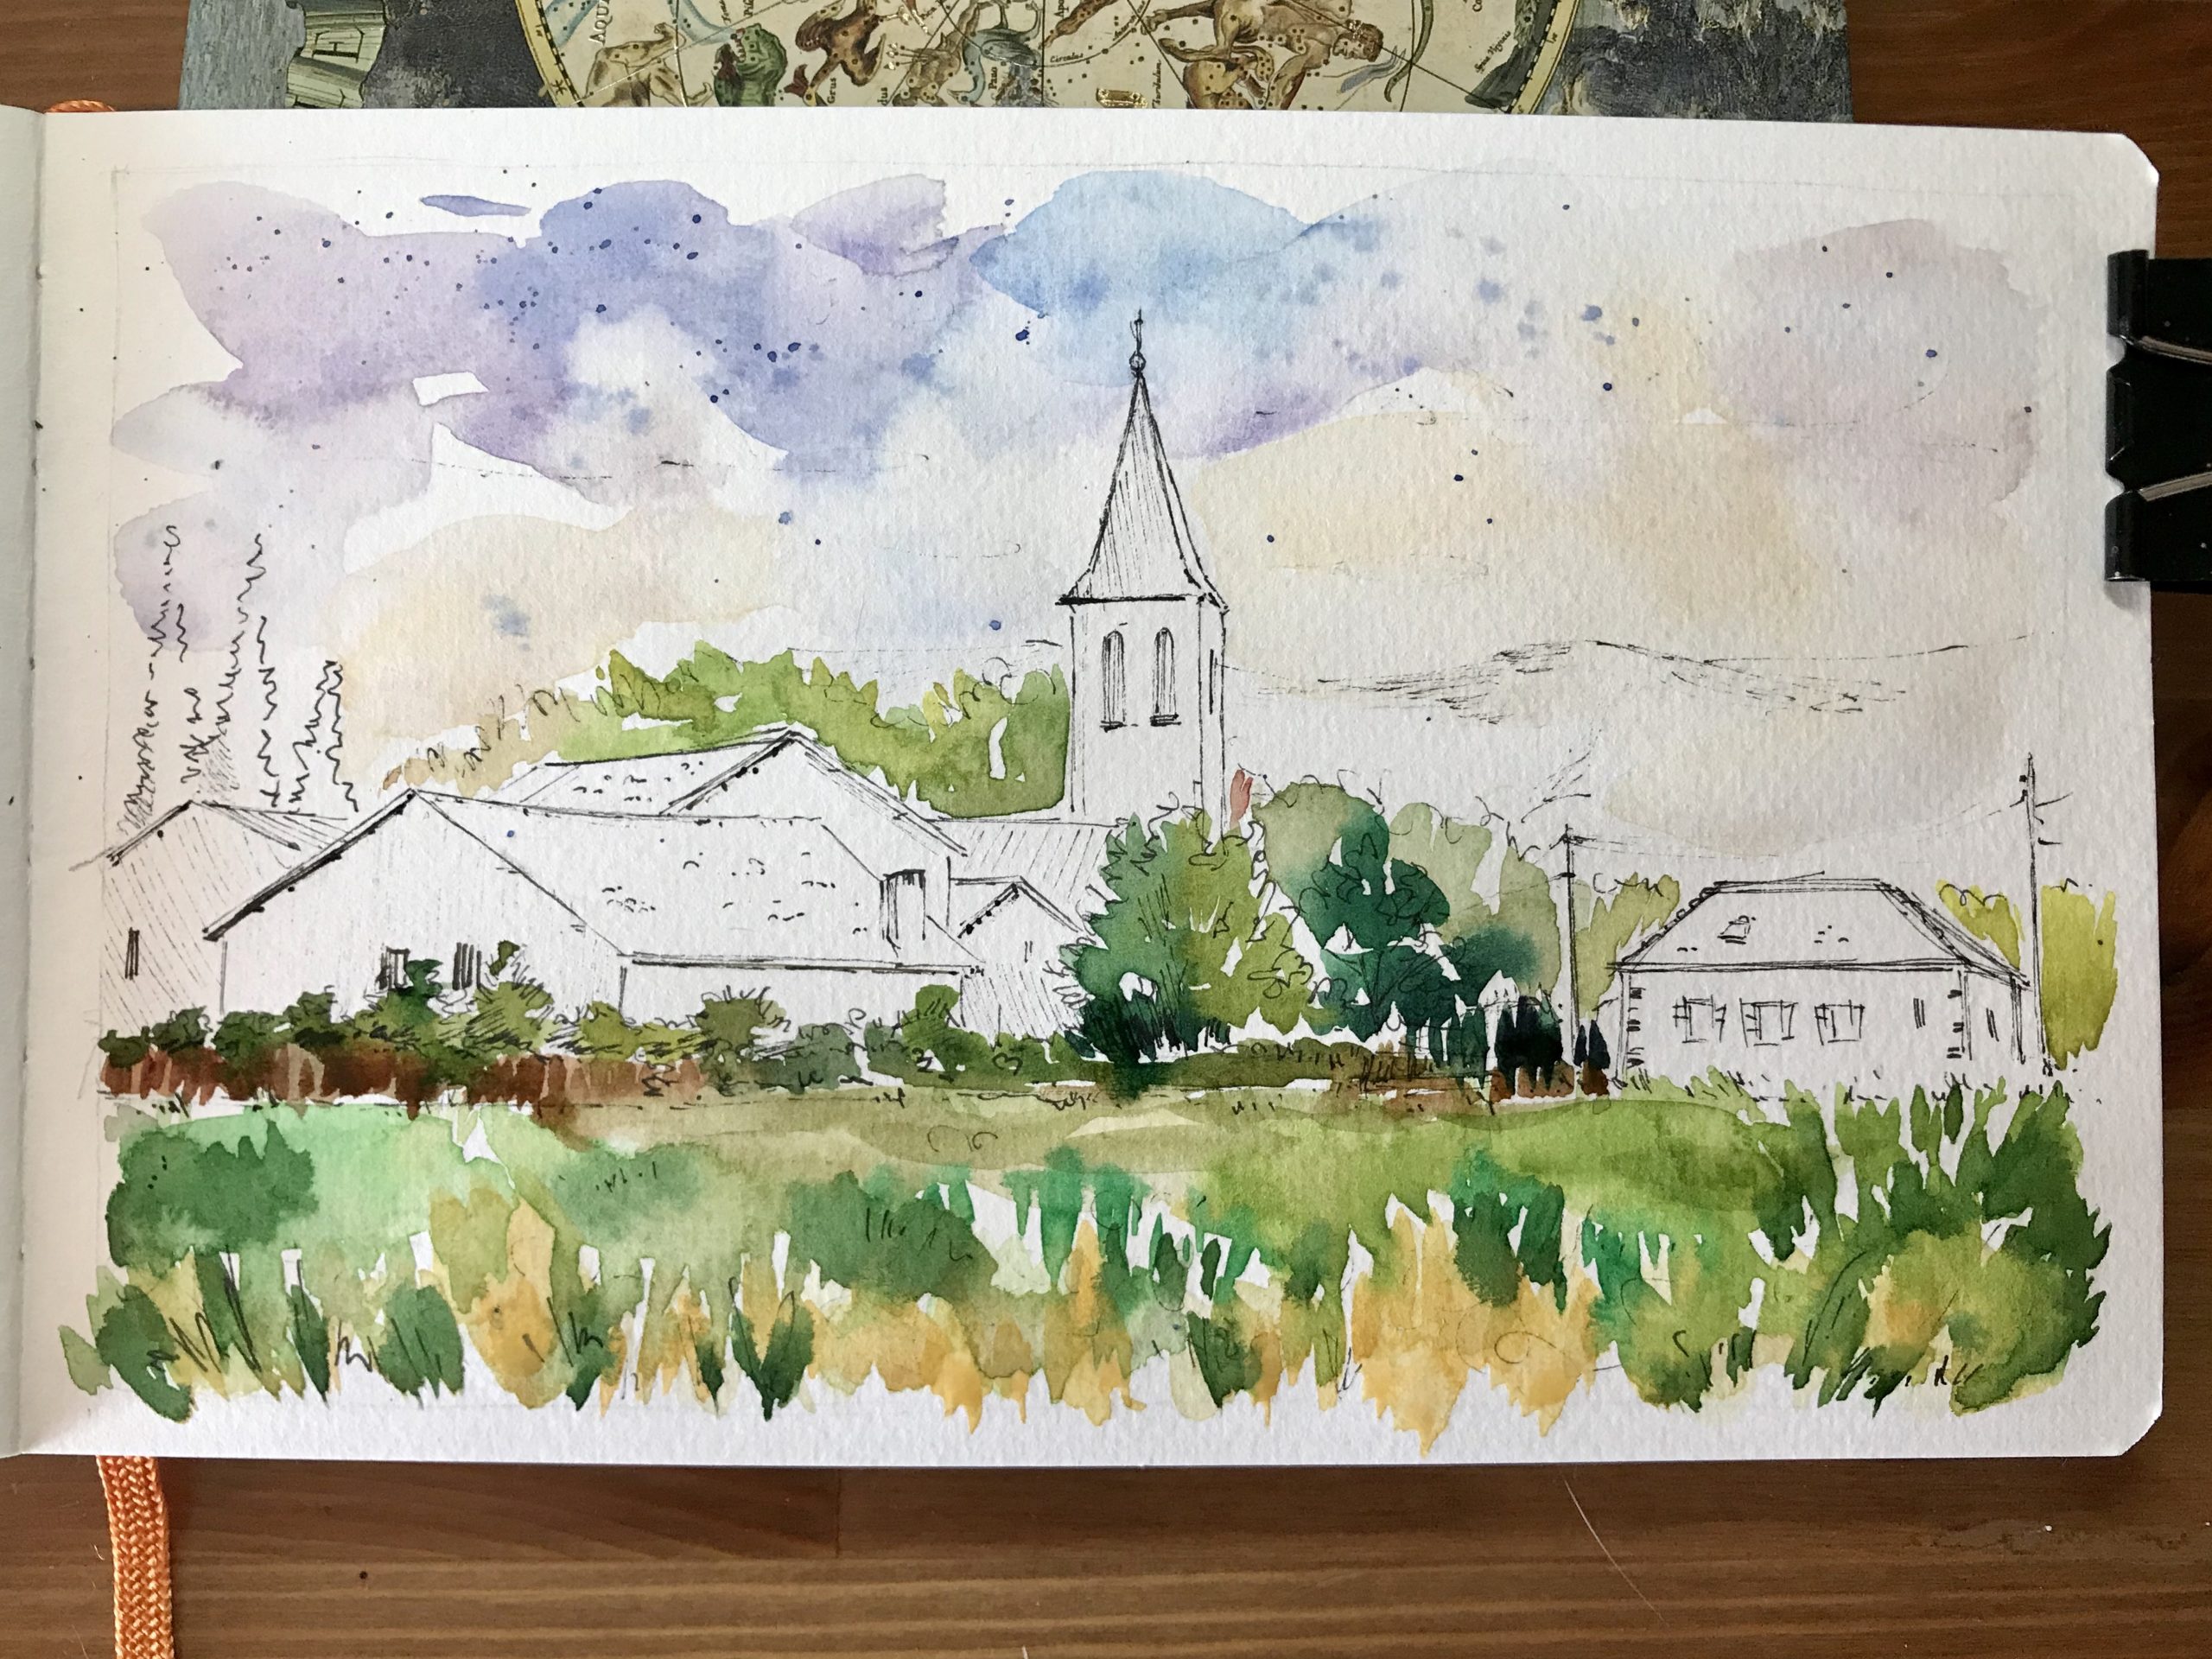
- Time to put some colors! The ink i used is waterproof so it will not ruin the sketch when i apply water
- I’m only going to use a round brush number 12 and the number 4 for the details
- Start from the top of the sky with some blue and violets, then gradually proceed down with a raw sienna covering the mountain too. Let it dry and splatter some blue.
- Use a mix of greens and yellows to paint the grass in the foreground as well as the trees, just remember to change the color mix very often.
- If you want to learn how to paint with this particular style I’ve got a Skillshare course covering the topic in detail: “Drawing Facades in Ink and Watercolors” . In the course I explain with audio and video how to obtain an expressive painting, and the first two months on the platform are free for you if you use my link (you can cancel any time and pay nothing at all! it’s completely free)
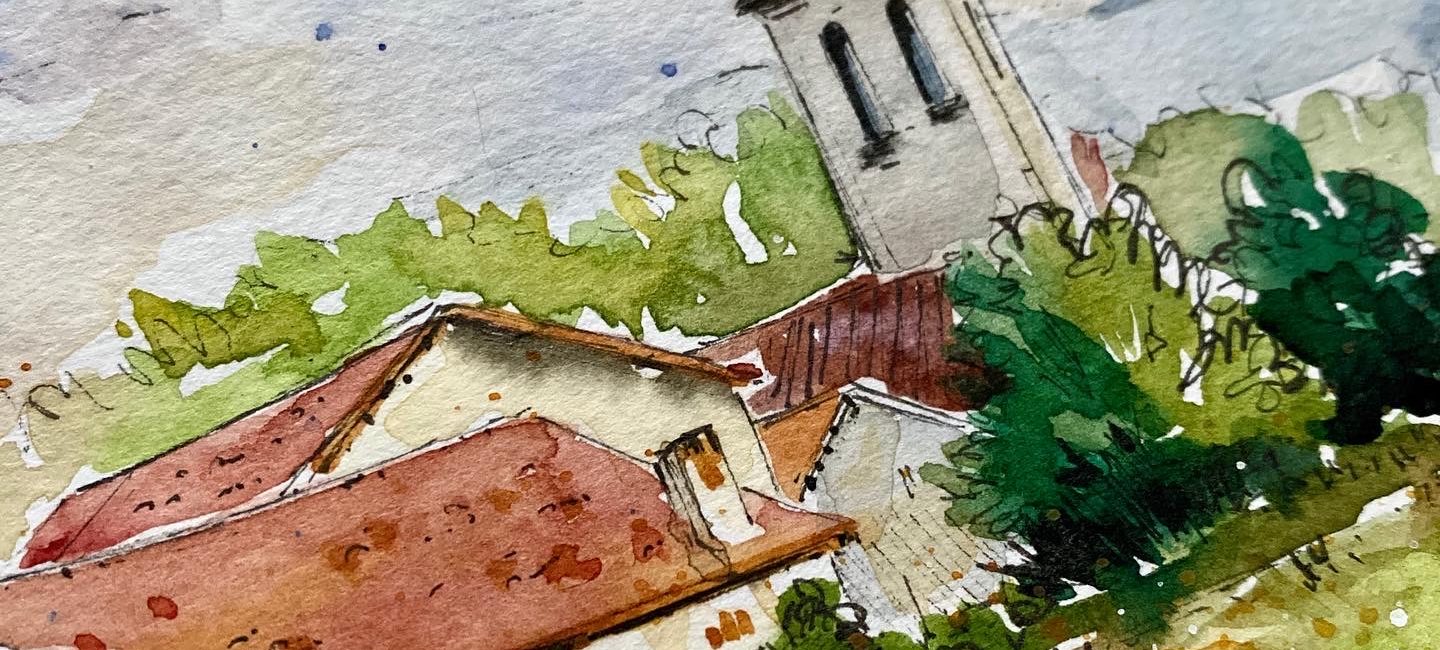
4 – Buildings
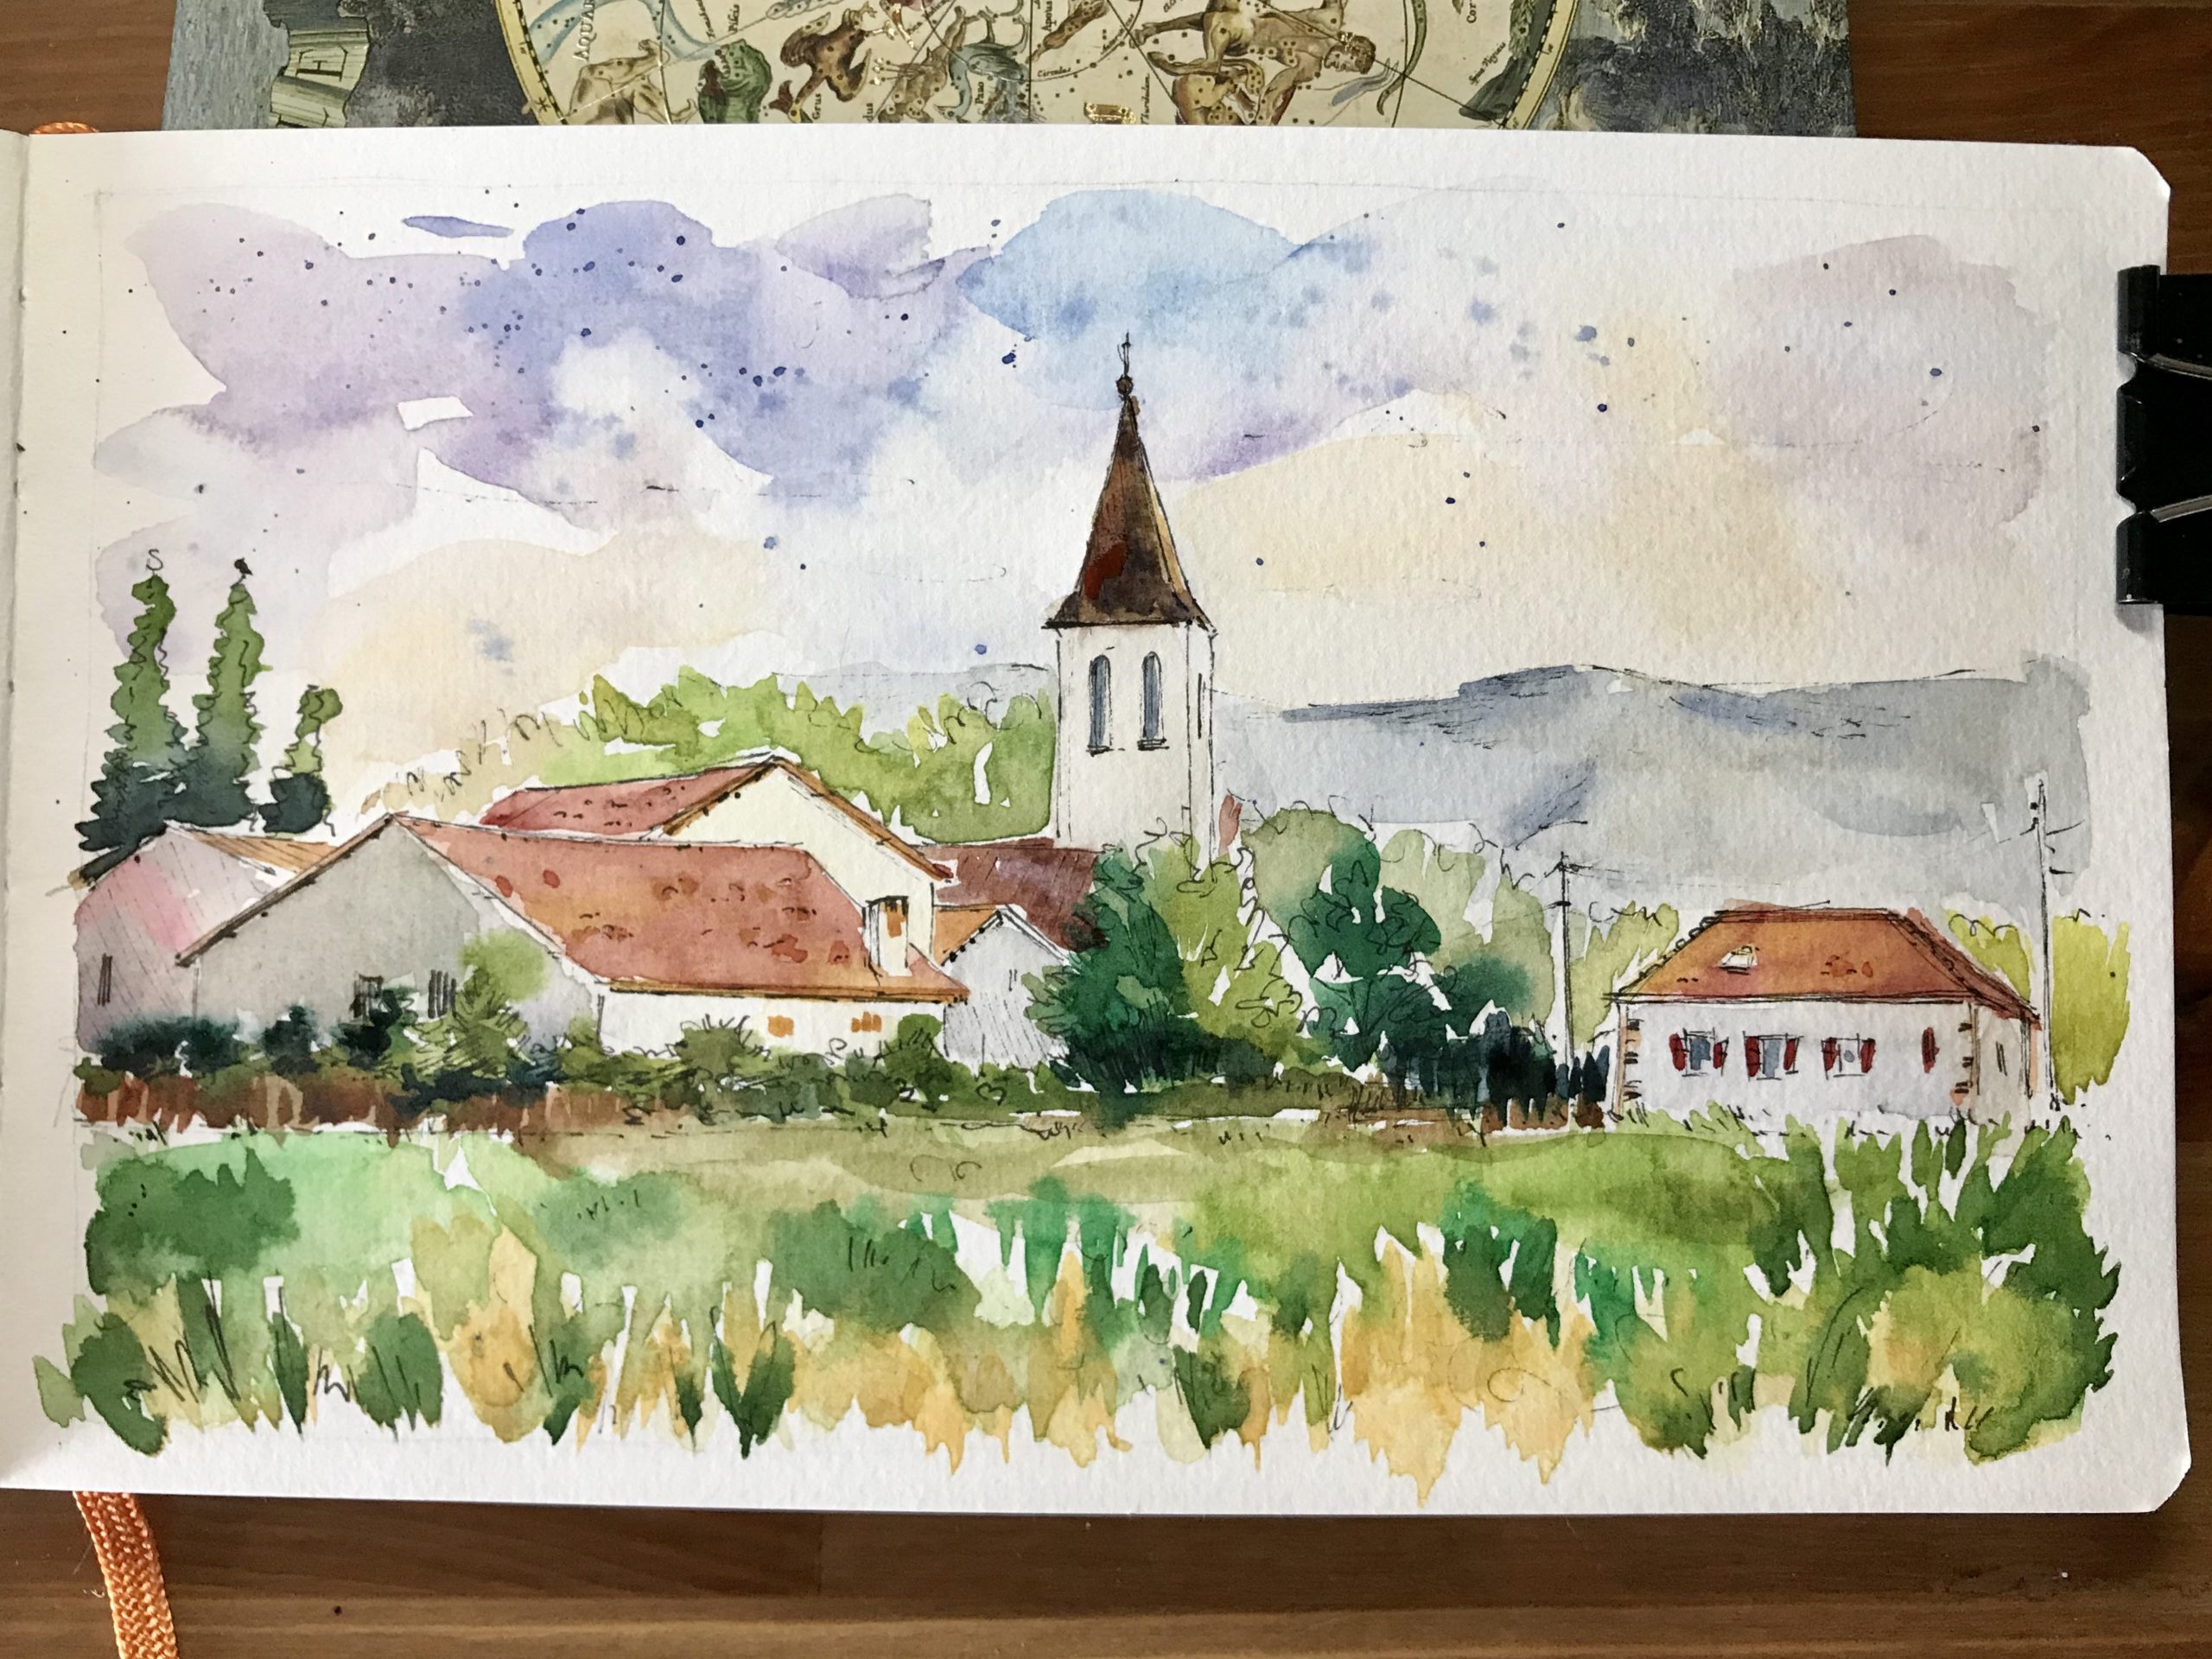
- Use an orangy/red to paint the roofs and tweak a little bit the bell tower adding some brown to the mix.
- Paint the walls with a very light raw sienna and then focus on the shadow sides of them with a gray (ultramarine+burnt sienna)
- Define a little bit the mountain in the background painting some shadowy areas with a touch of indigo
5- Finalization
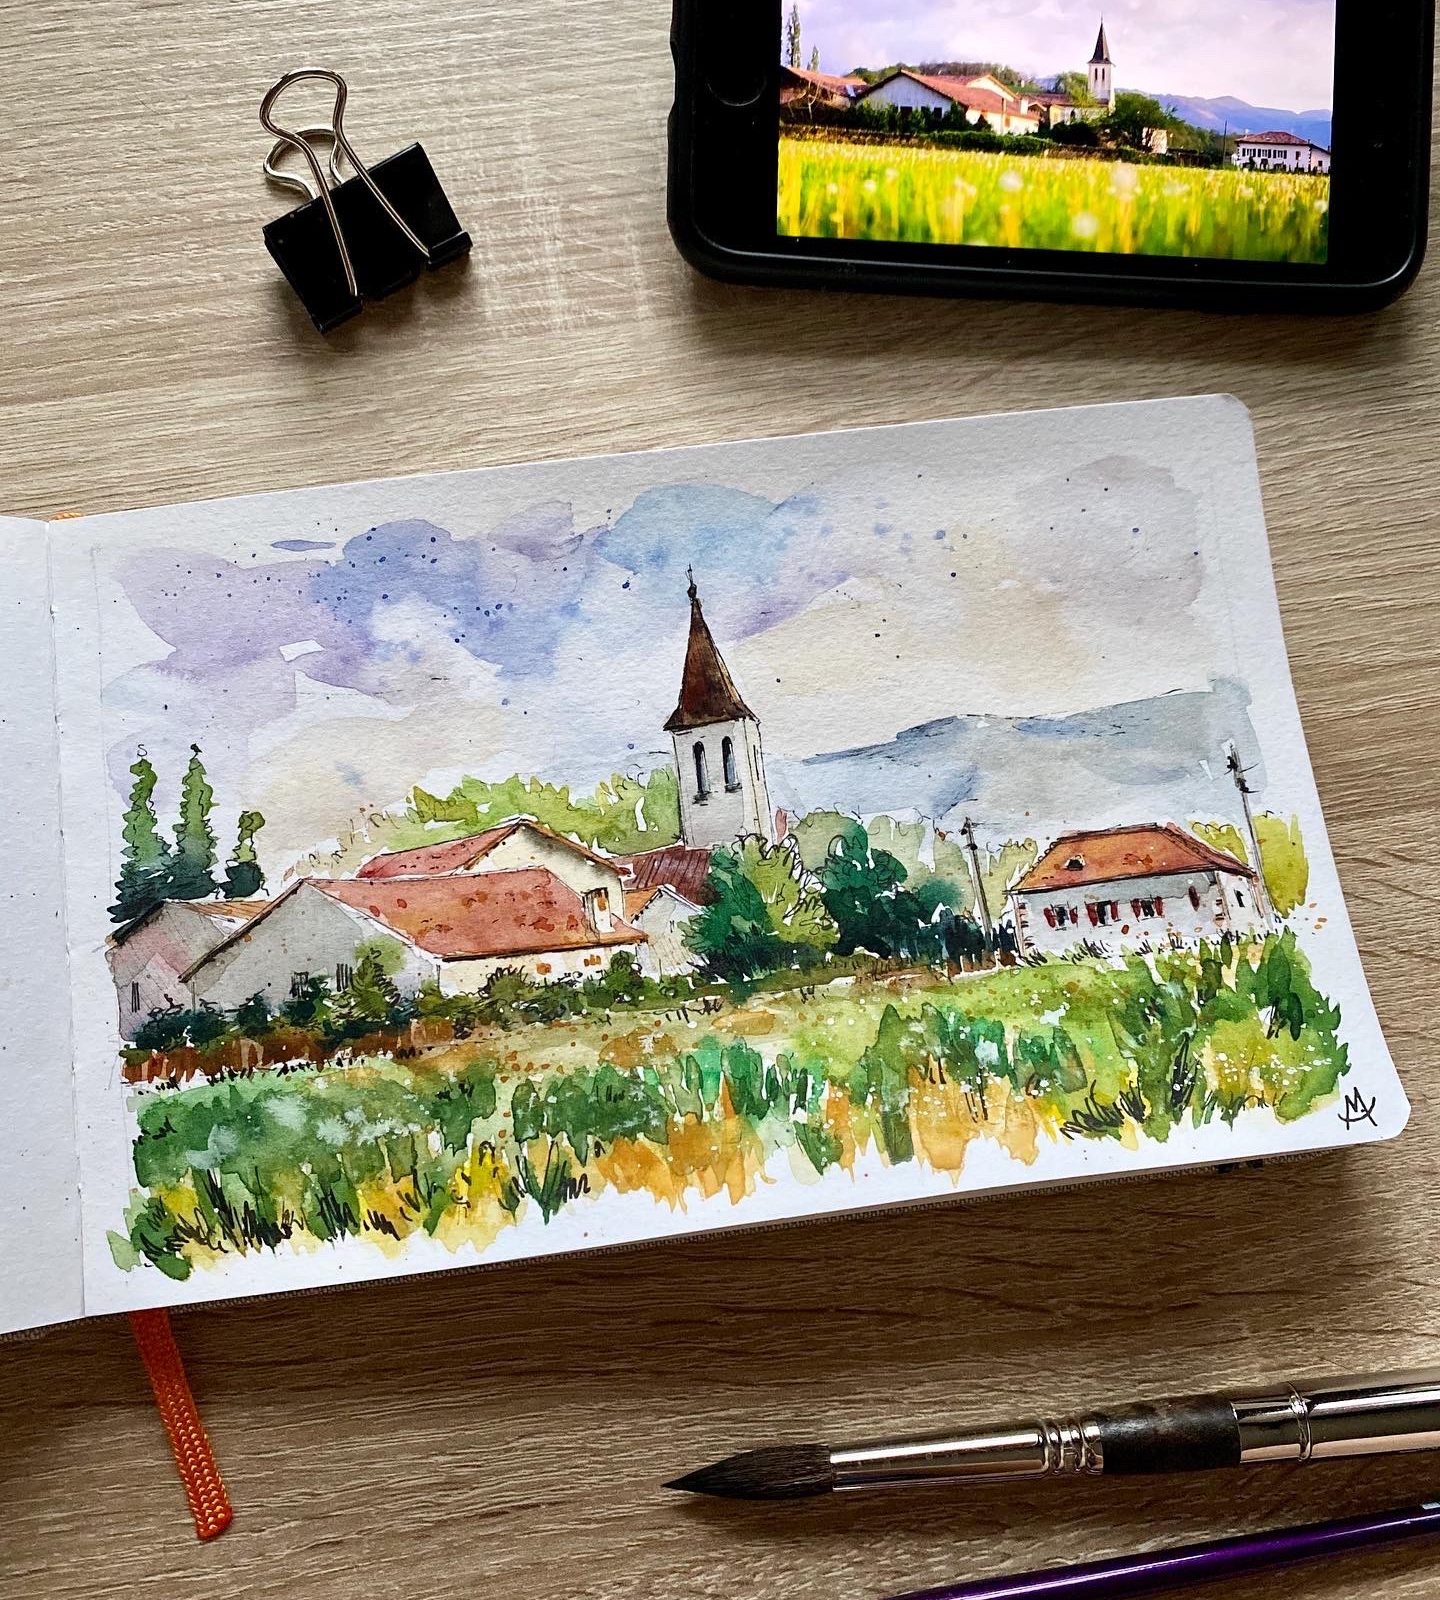
- This is the moment I like the most: details!
- Darken the deepest shadows with the fountain pen
- Refine trees and grass with ink here and there
- Splatter white gouache and Naples yellow in the foreground as a final touch.
I thought it would be nice to add the timelapse video of this painting to guide you! Hope you like it!
Now take a picture of your fabulous painting and, if you like, post it on social media!
Remember to tag me on Instagram (do it on the photo, not in the caption! This way i won’t miss it) with @chiaramazzetti.art and put the hashtag #chiaramazzettitutorial, i’d love to see what you create!
Happy painting!
Chiara
List of watercolors (based on the brand i used for this painting: White Nights Nevskaya Palitra)