


This post is about a house portrait in Jæren, Norway. Let’s see the process together!
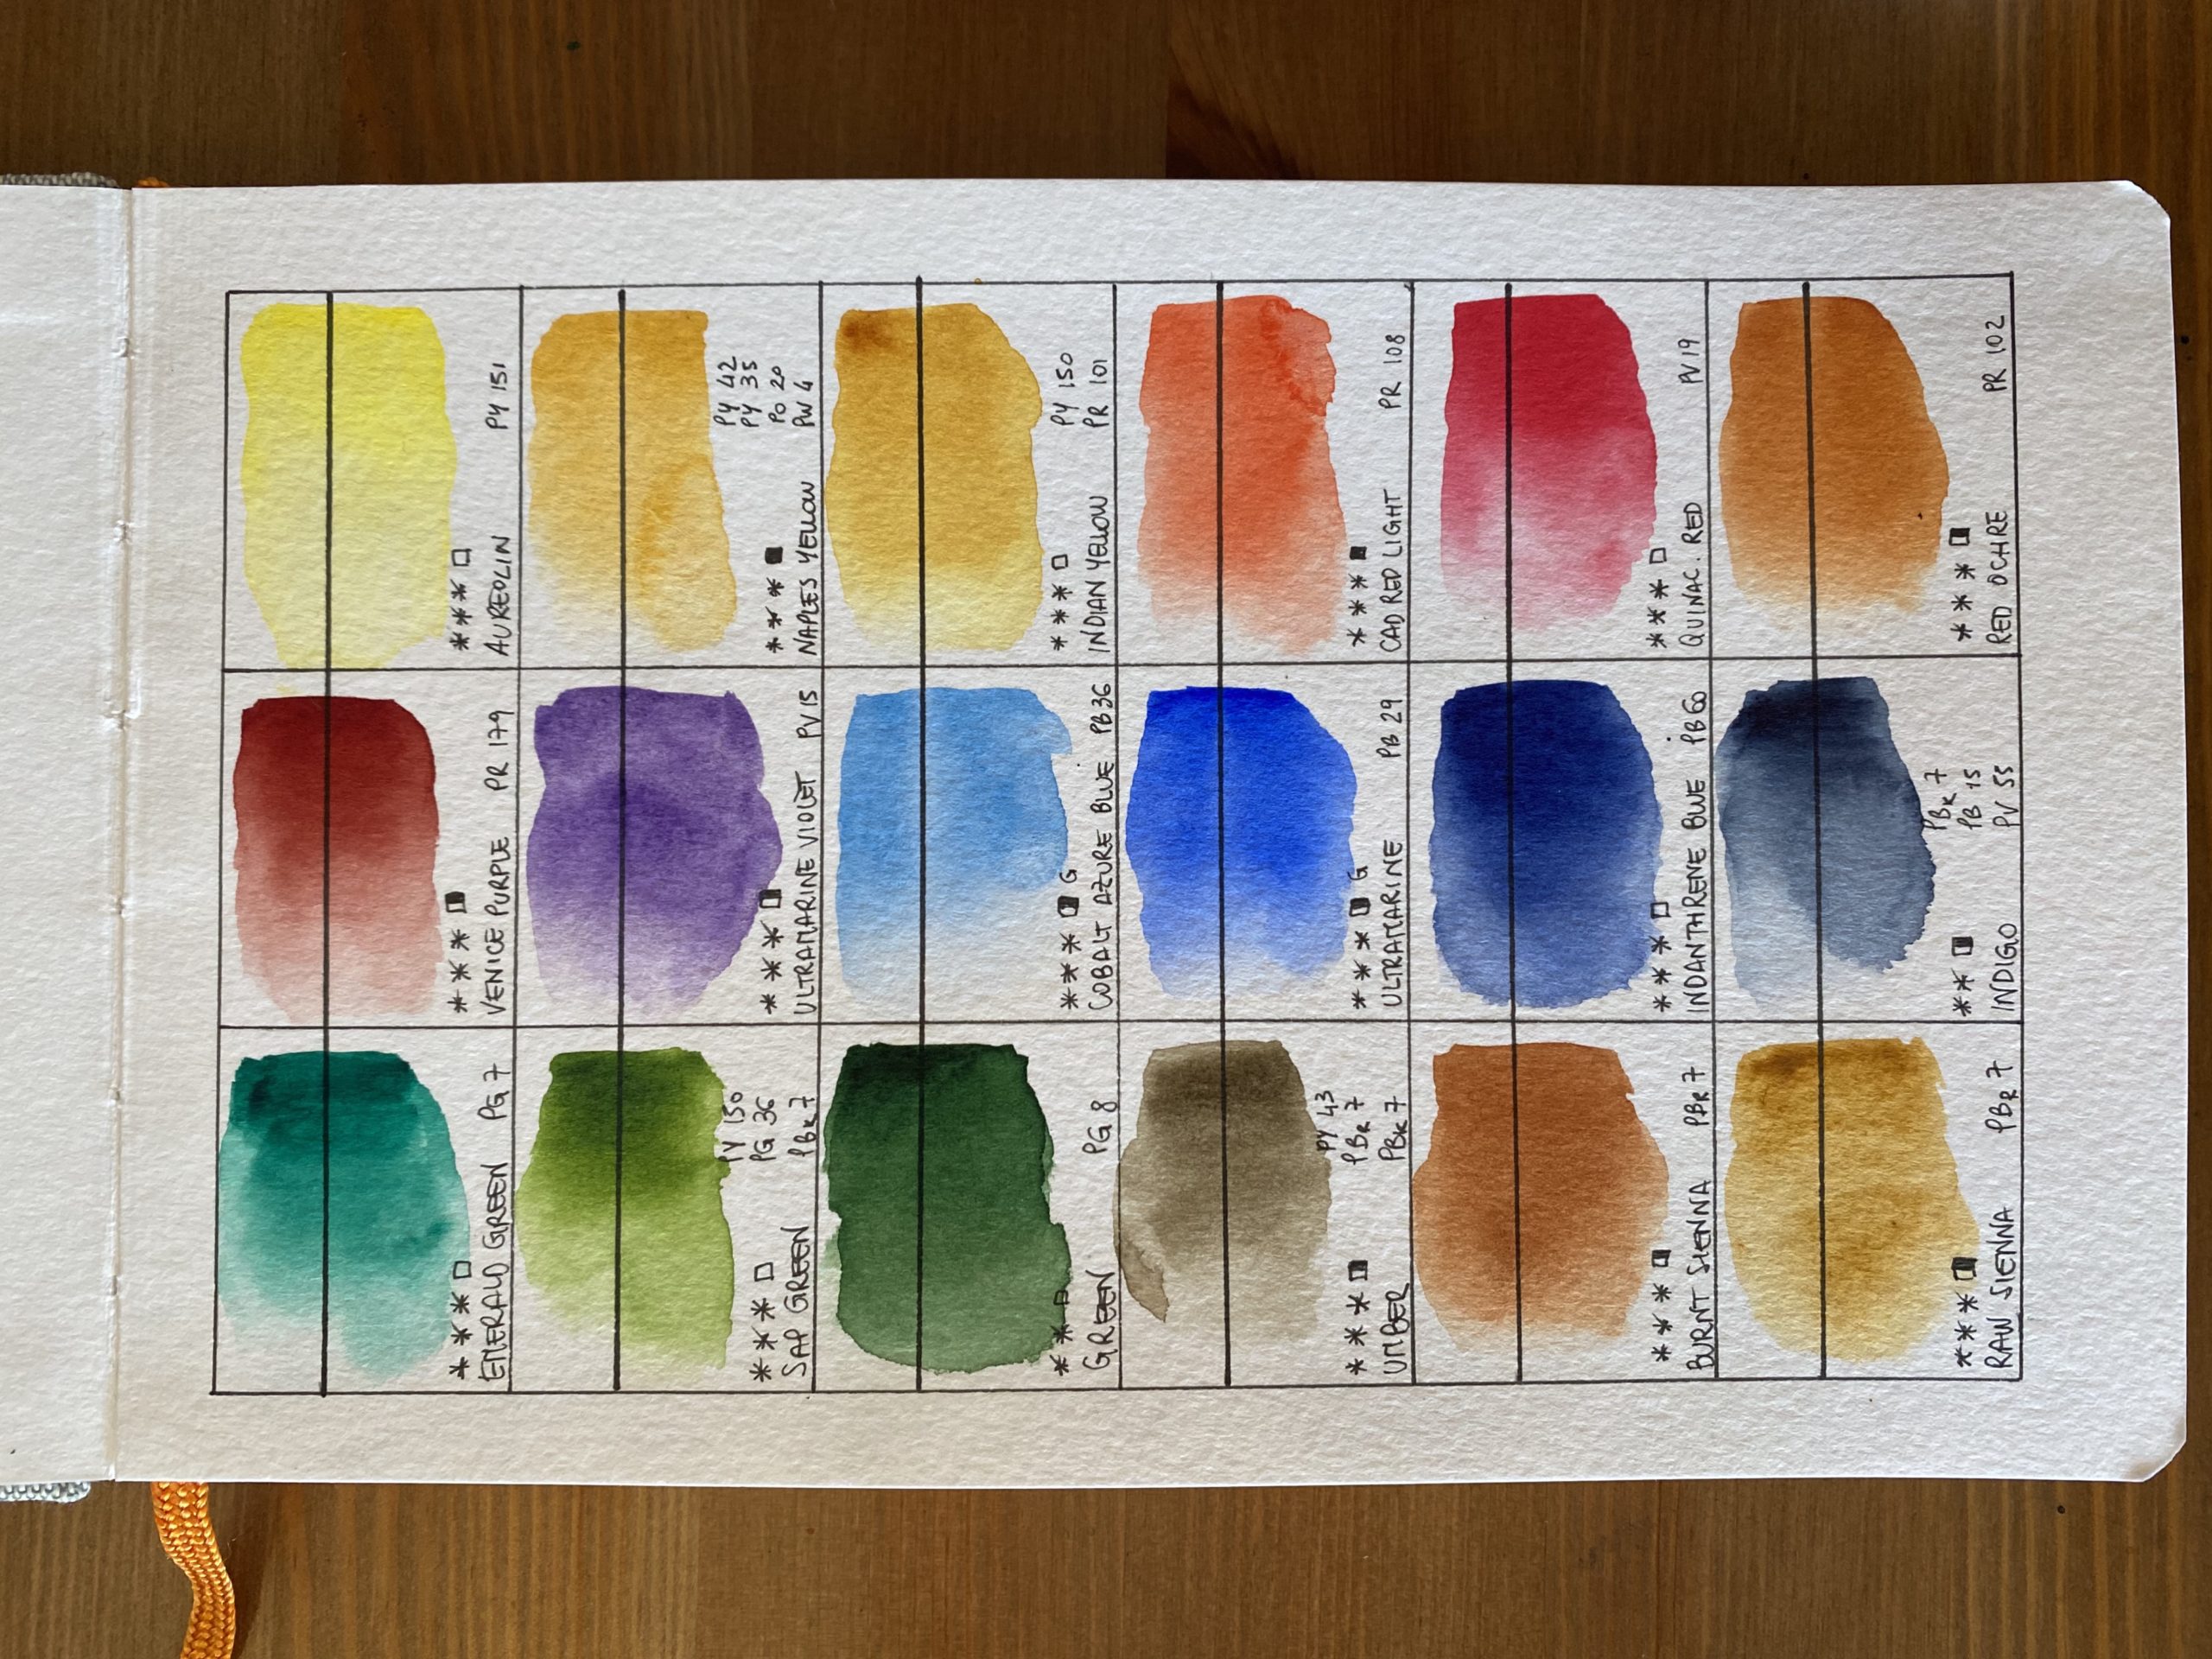
Supplies
You will need:

1 – Sketching the house
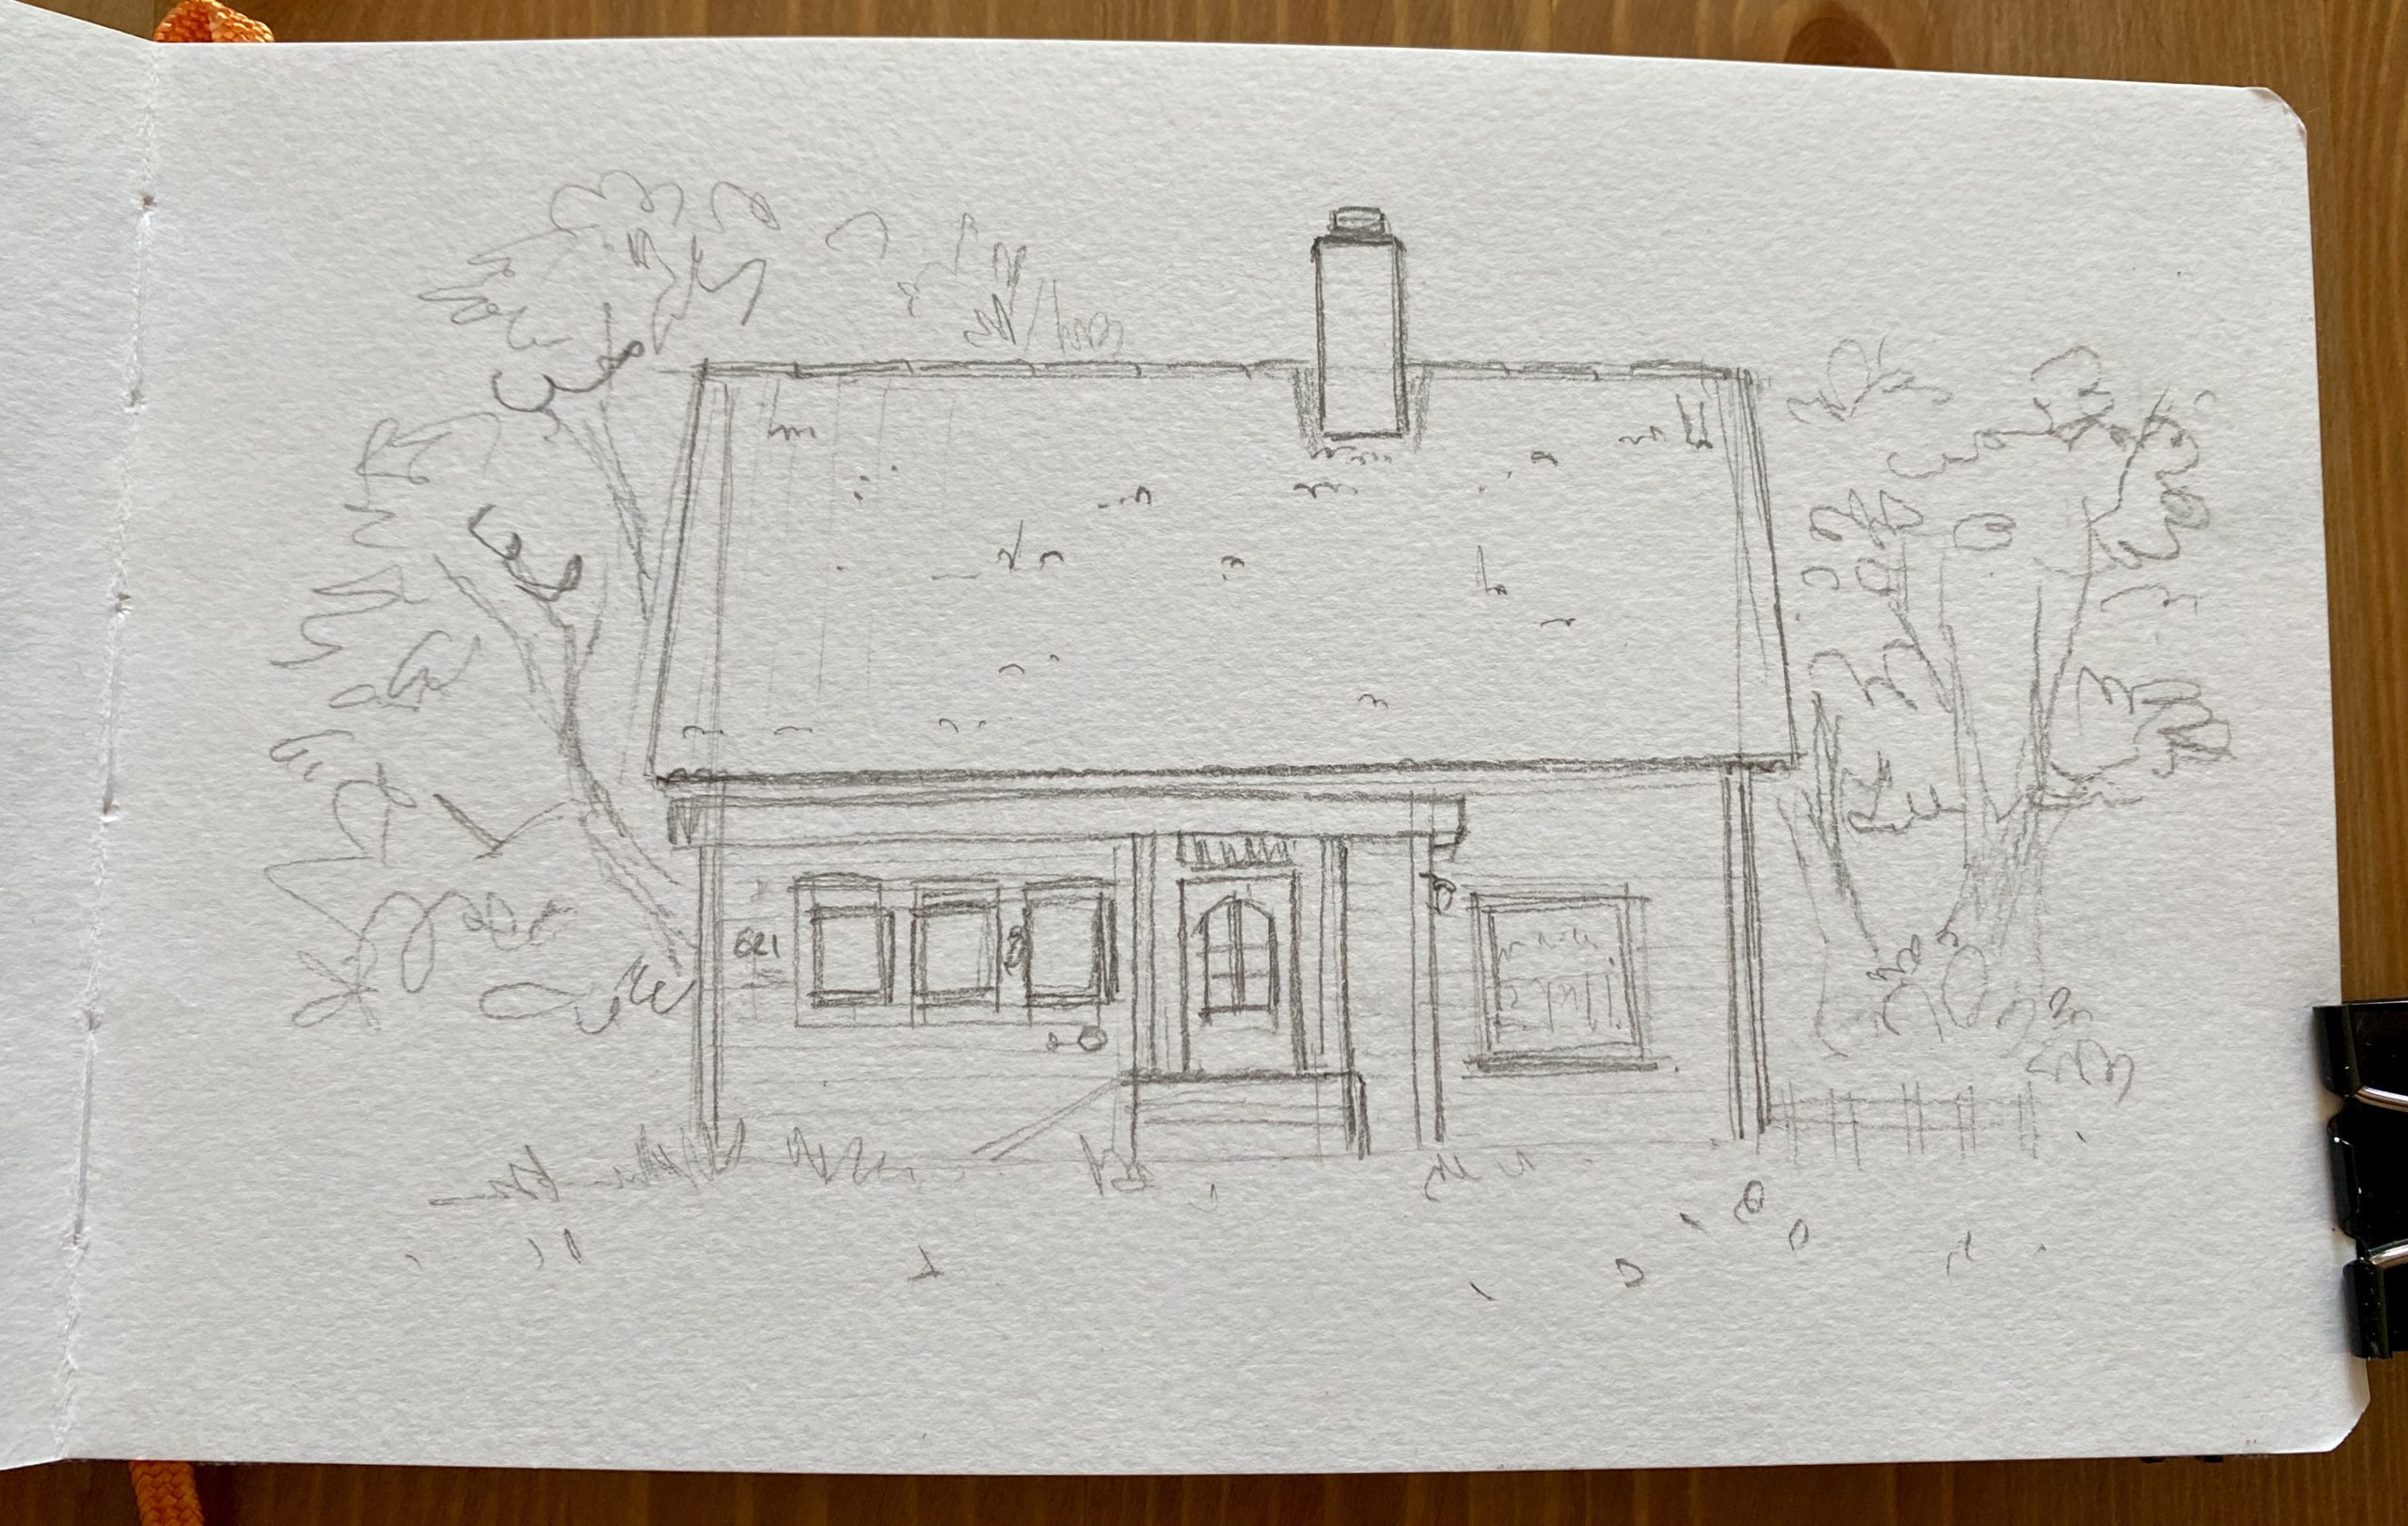
- Since the house is the focus , I “sacrifice” part of the sky and the hill, completely deleting the sea in the distance.
- Draw the house keeping in mind its proportions: see the global shapes and make comparisons to better relate its components. For example the roof with the front wall or the windows relating to the door.
- If you want to go deeper on this subject I recommend you to watch my class “Drawing Facades in Ink and Watercolors”, in which I filmed a chapter where I talk extensively about this.
2 – Ink
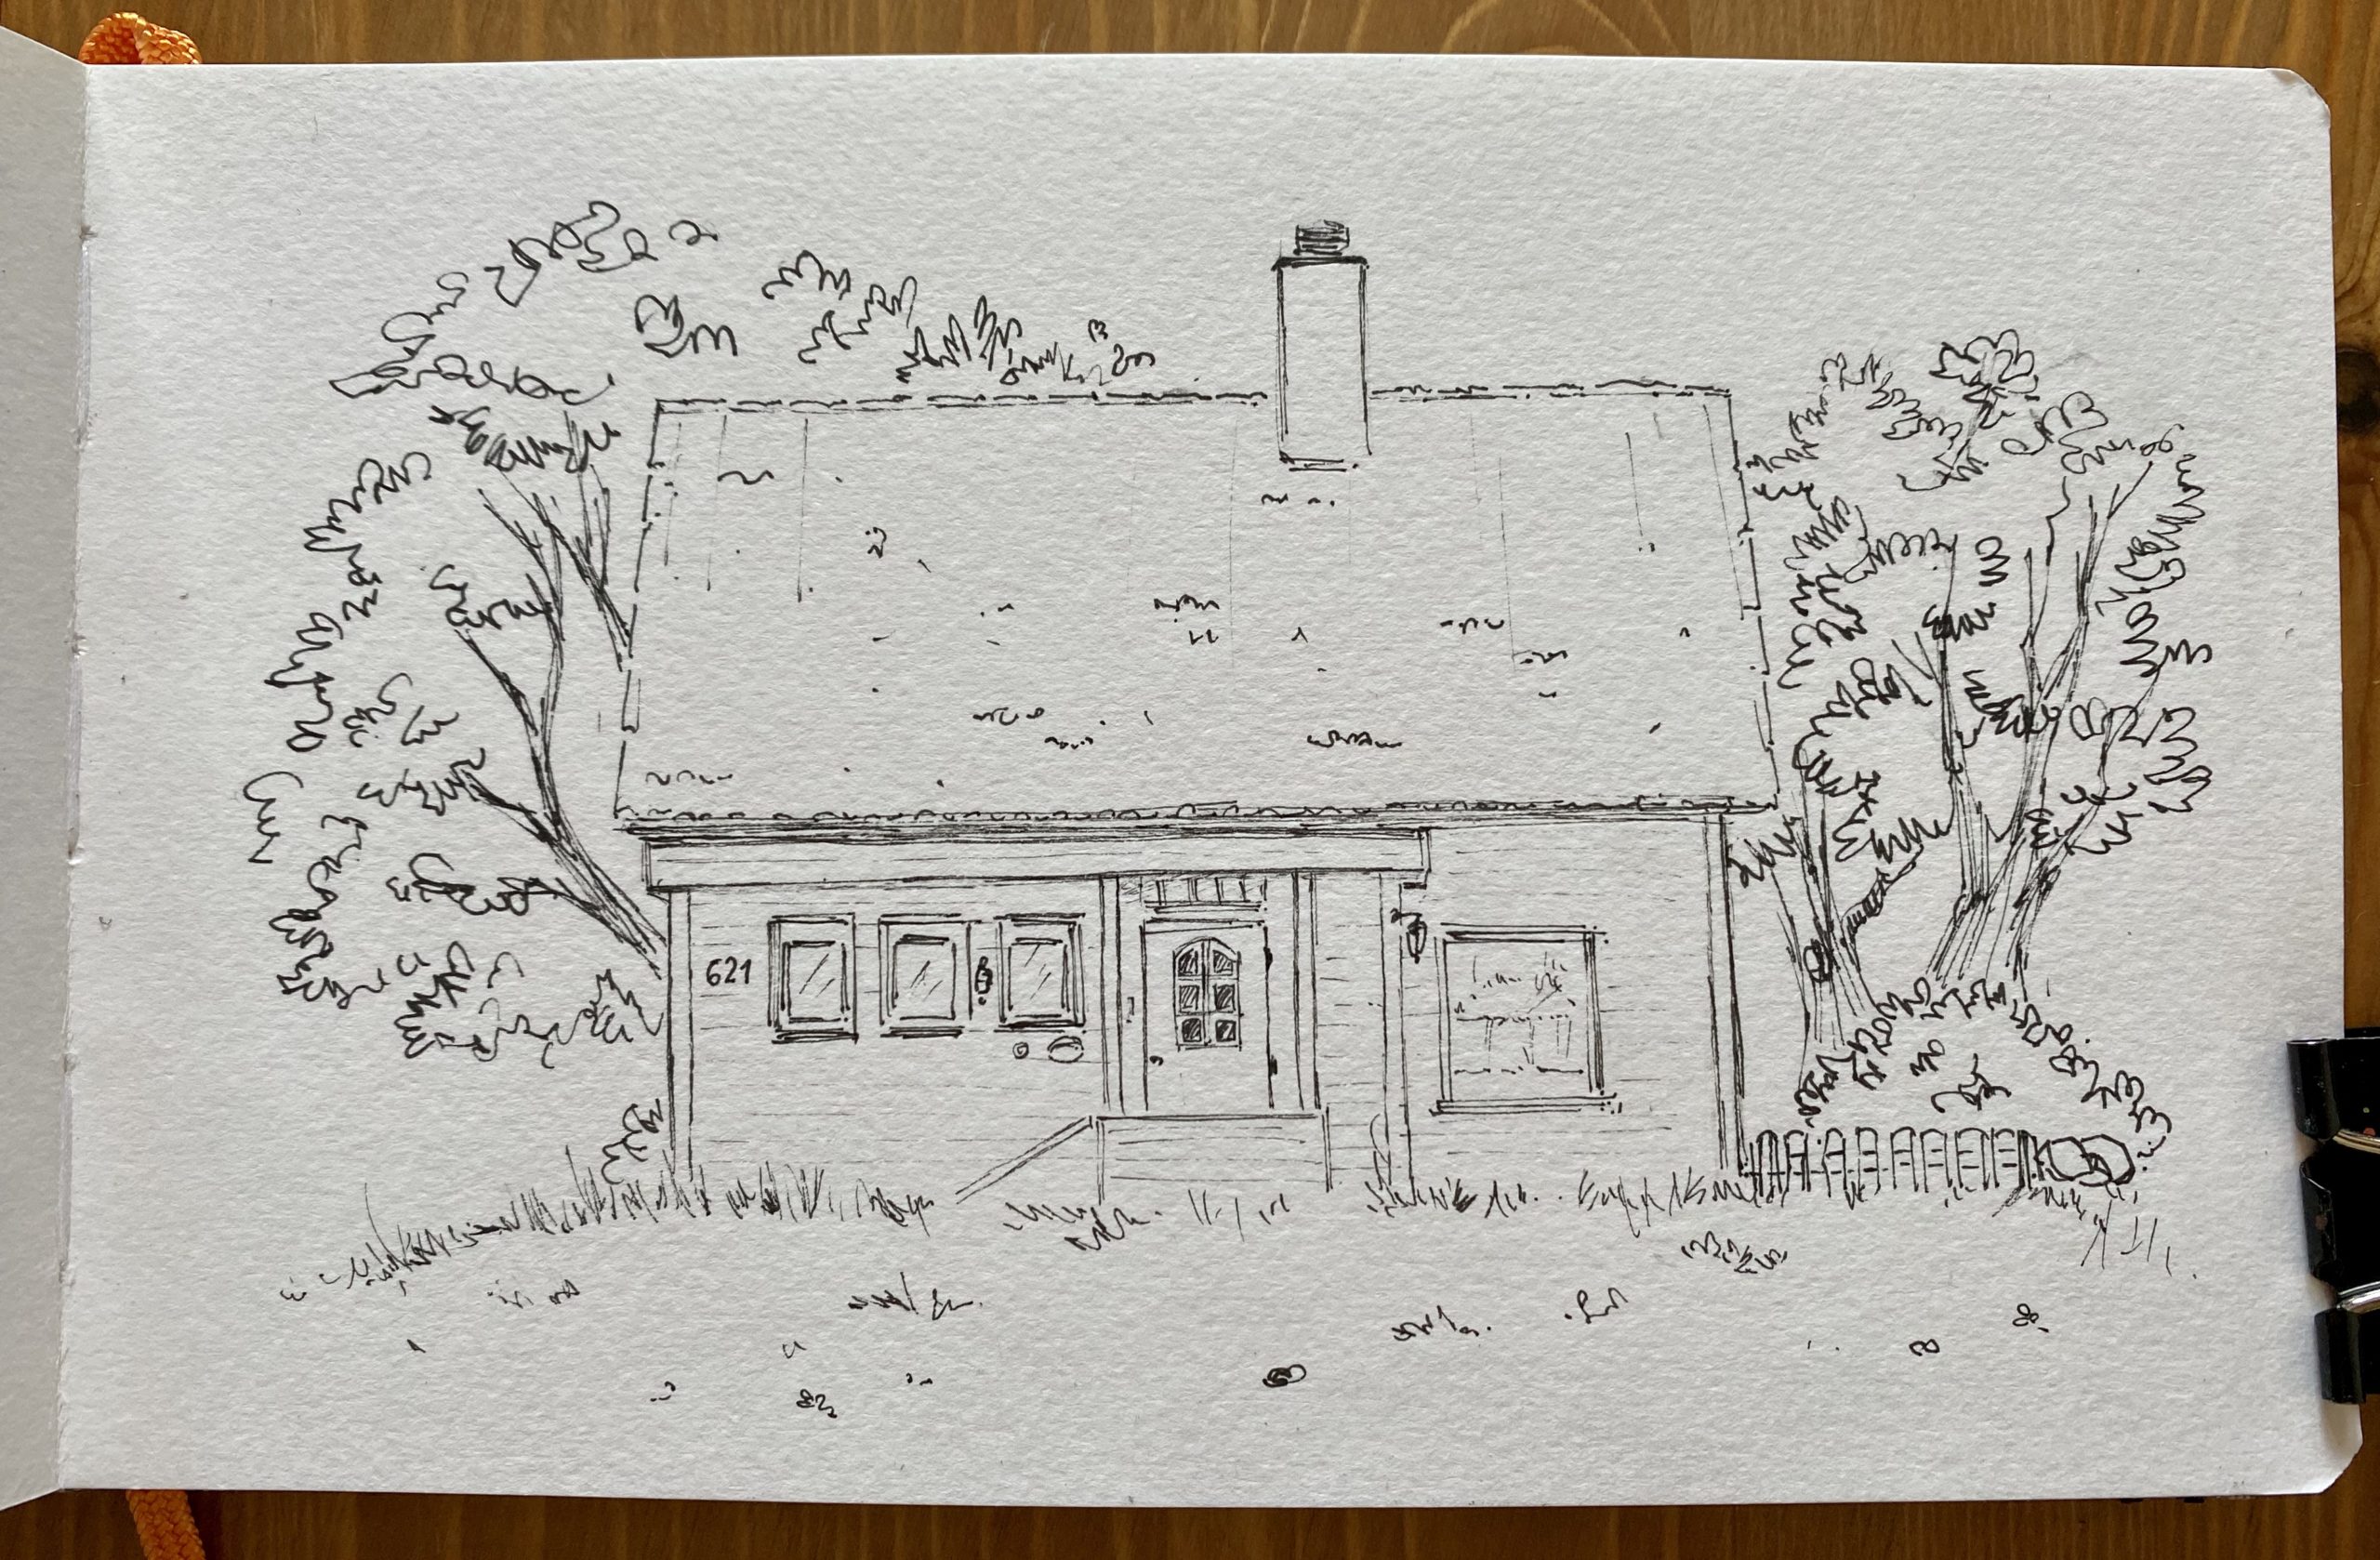
- Go over the pencil adding more details on the house, trees and greenery using fineliners 0.5 and 0.1 with waterproof ink.
- I emphasized the texture of the trunks with decisive lines while on the house I drew broken and light horizontal strokes.
3 – First layer of the house
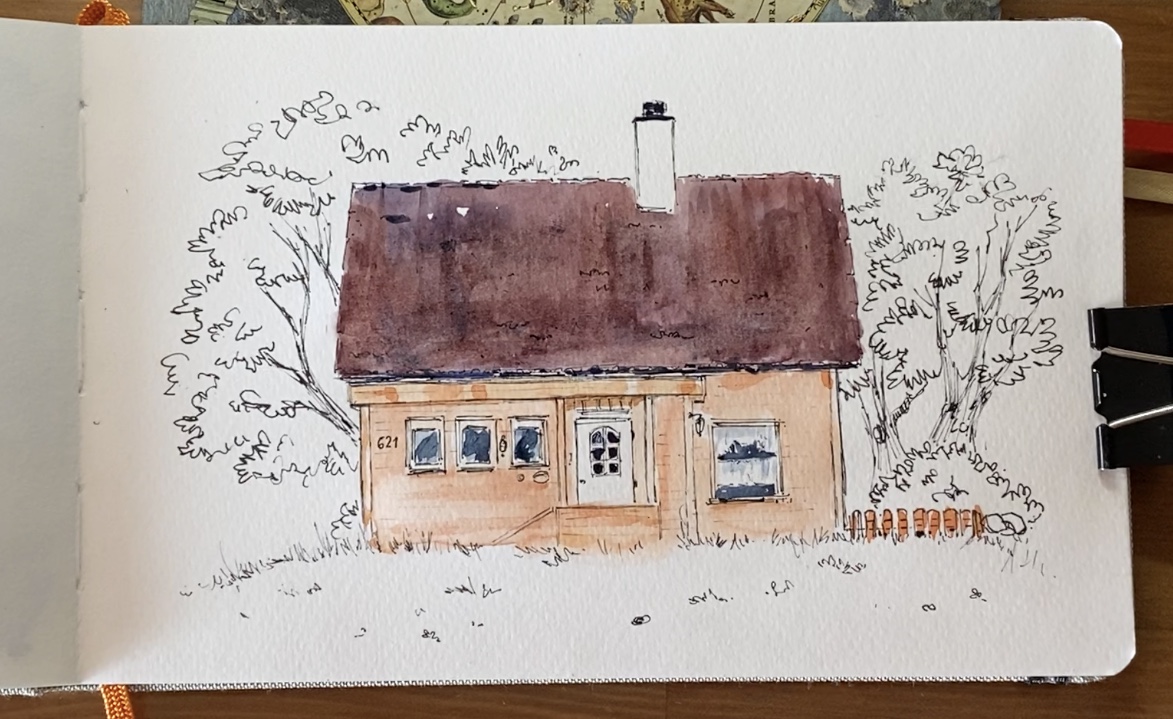
- I’m only going to use a round brush number 12 and the number 4 for the details.
- Take a brownish red with touch of violet and go over the roof. Next with an orangish mix paint the frontal walls and the fence.
- Put a drop of Indigo/dark blue on the windows.
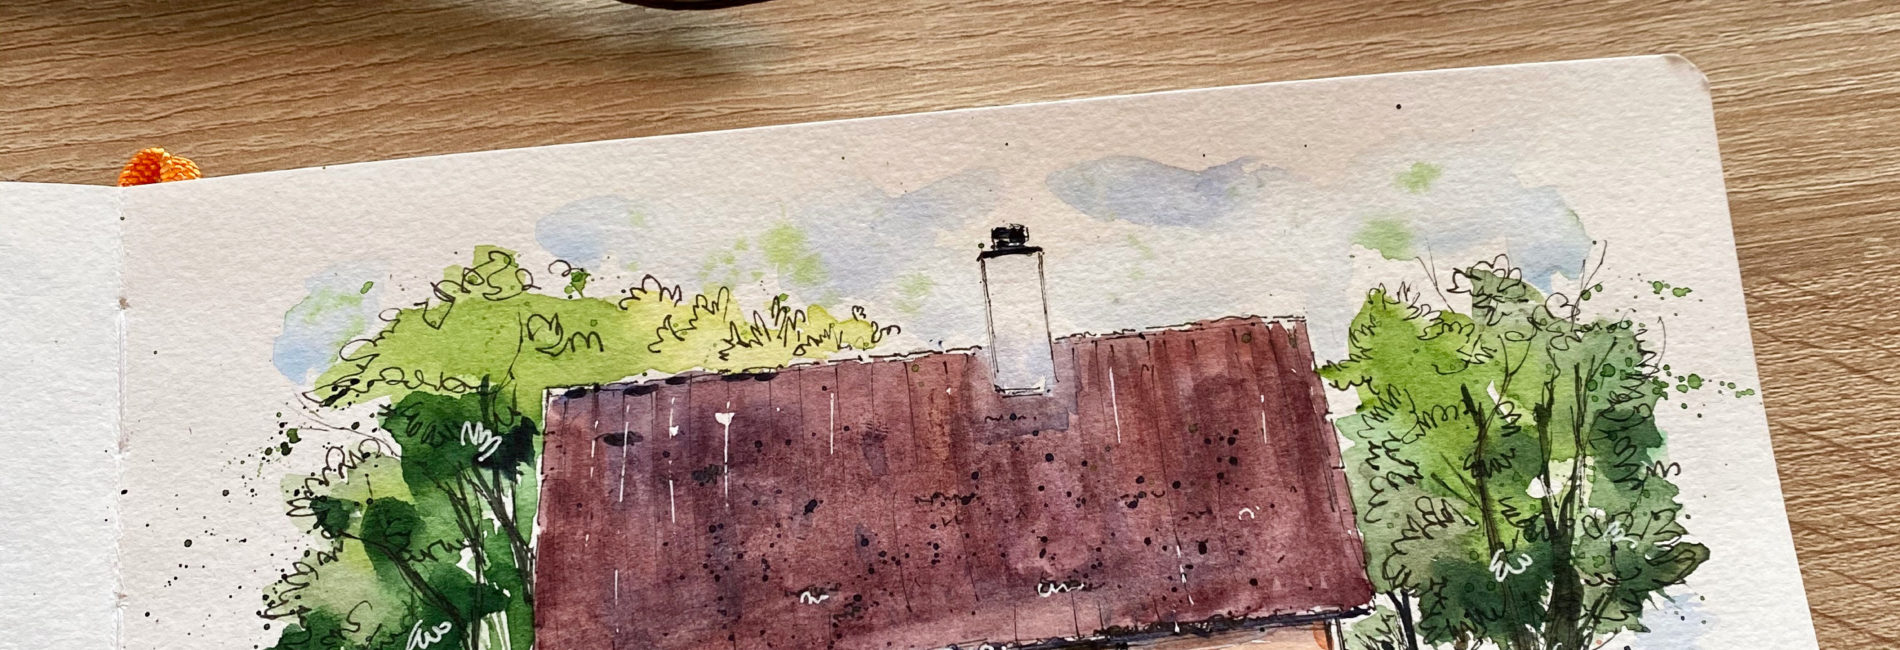
4 – Surround it with green
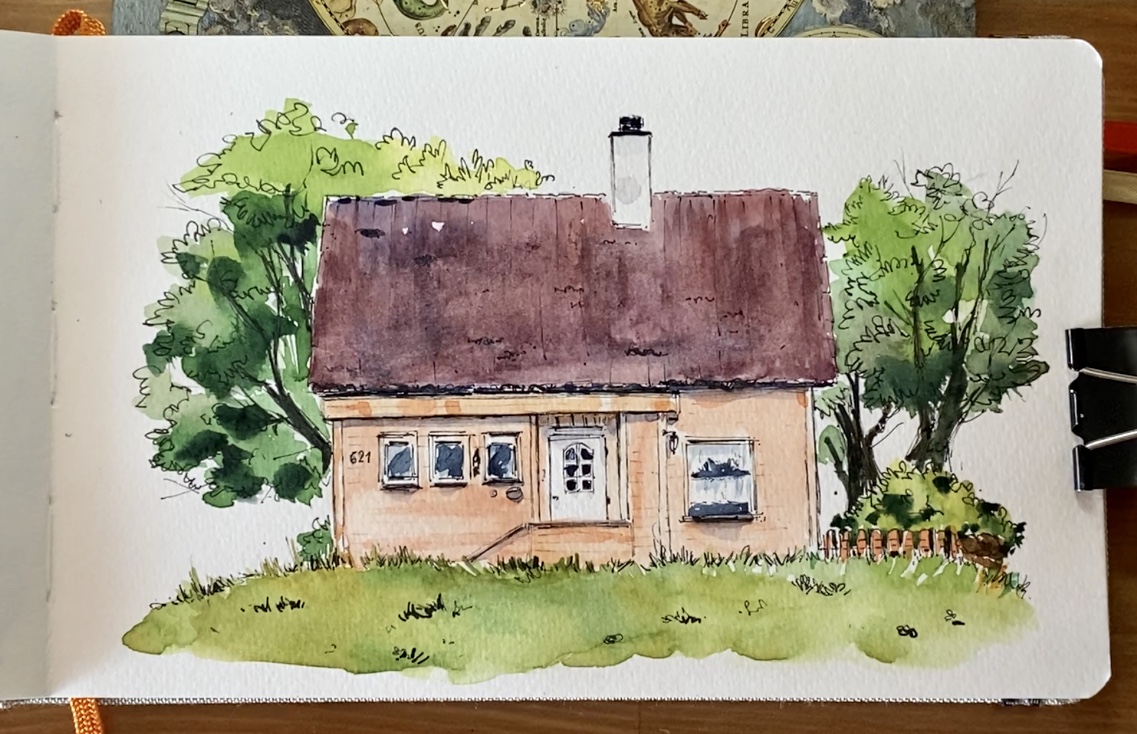
- Make washes of different shades of green and let your instinct go!
- First paint a light layer on trees and grass, then when it is dry, put colder and darker shades representing the foliage in shadow. Follow the ink shapes you drew before.
- With grey (you can make one yourself, for example mixing burnt sienna+ultramarine) make some tiny lines under the windows and the roofs. Representing shadows will make your paint more realistic.
- Refine details on the facade and on the lawn with fineliners or fountain pen.
5 – …and details to finish!
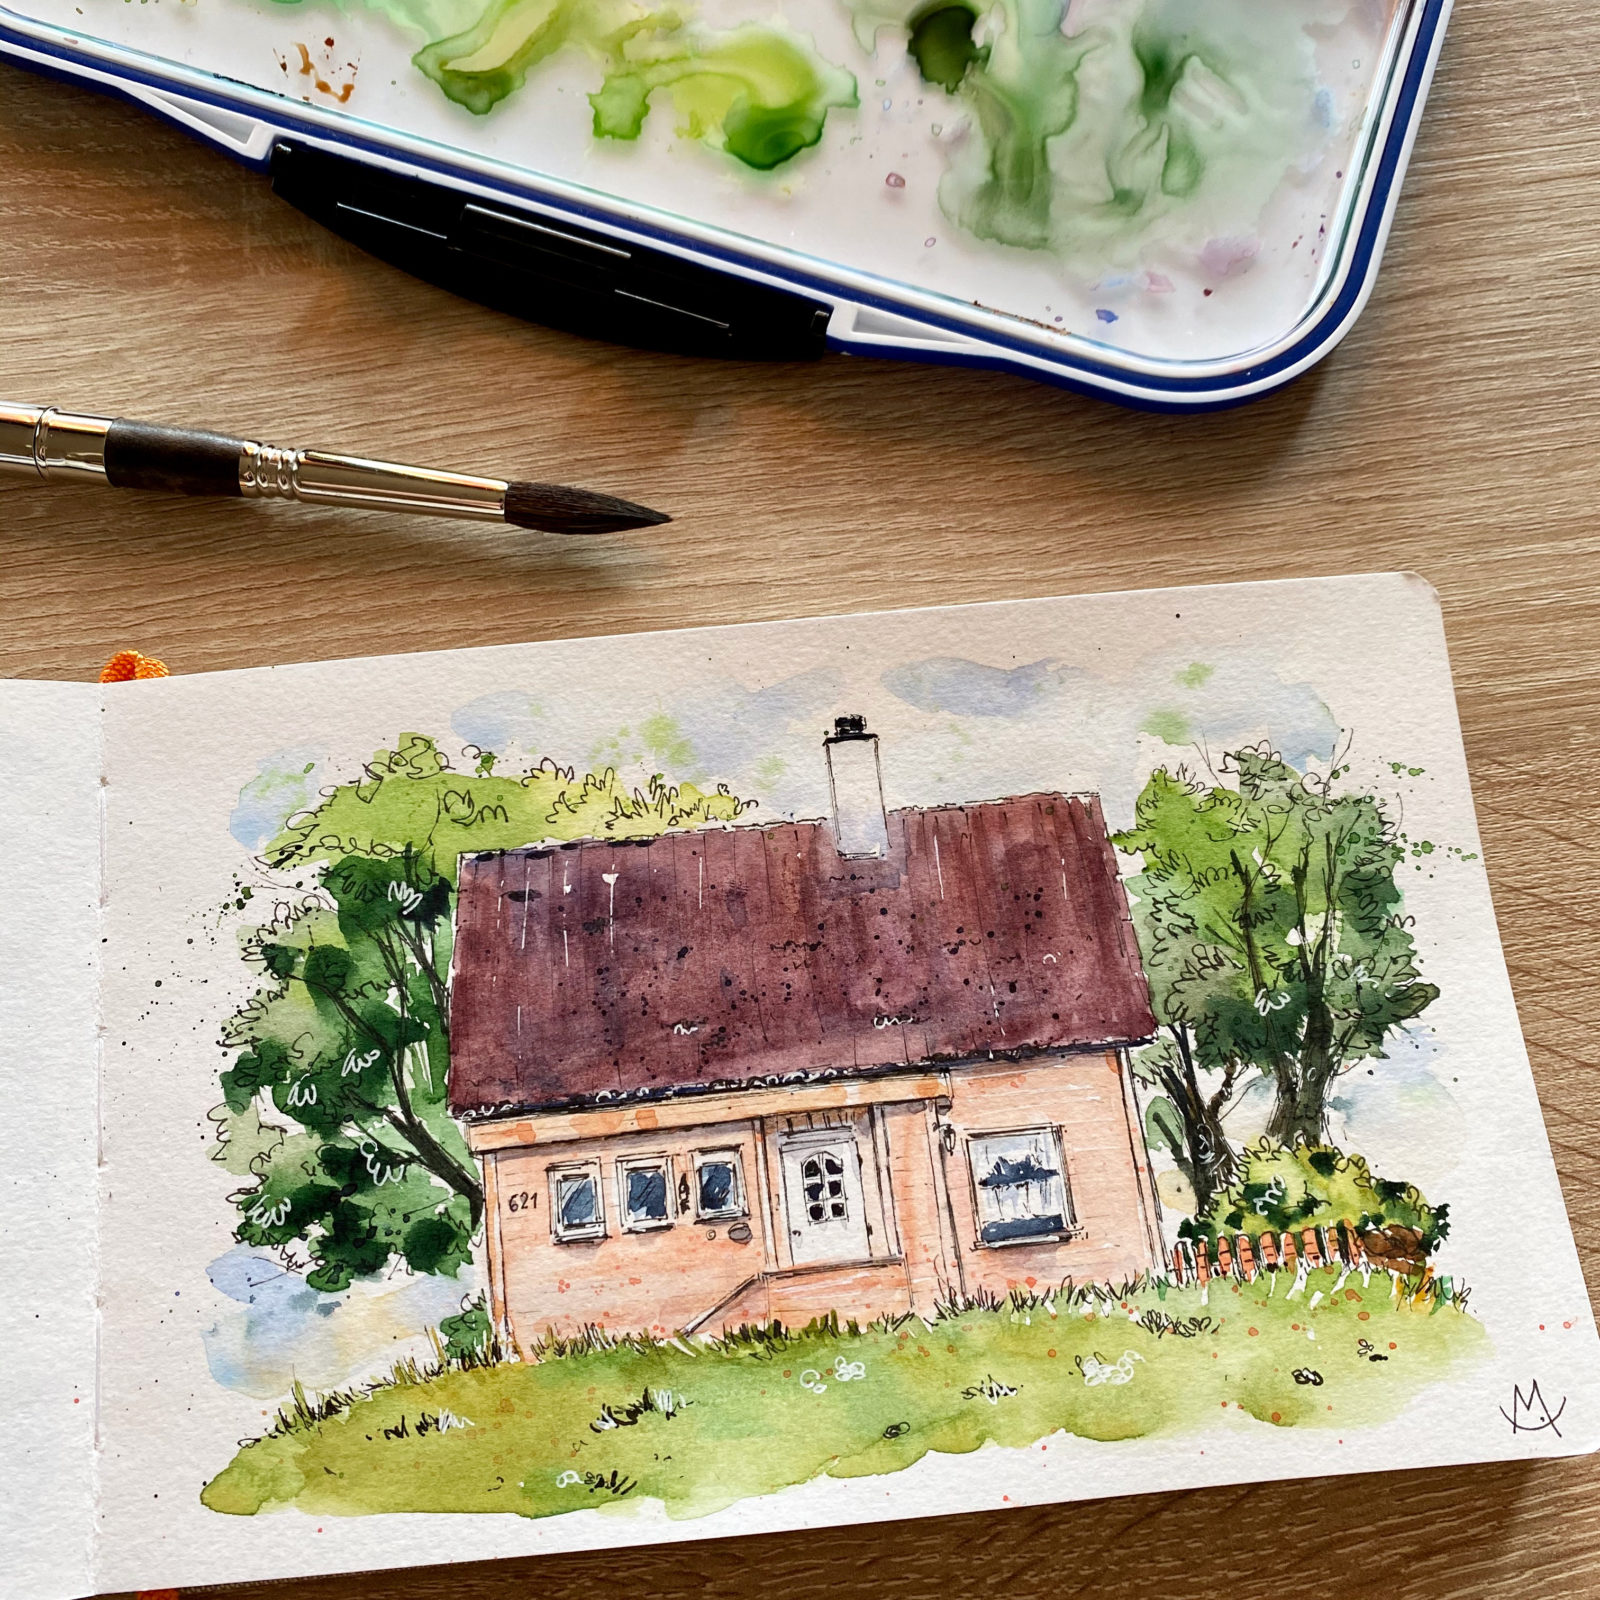
- With a white pen create contrast here and there putting it on dark areas, especially on the crown of the trees and on the roof.
- With a veeeery light blue paint some washes around the house, representing the sky.
- Splatter green on the sides to make the foliage lively.
- Splatter indigo on the roof the create uneven texture.
As for the previous tutorial, here’s the timelapse video to guide you while you paint this beautiful house!
Now take a picture of your amazing painting and, if you like, post it on social media!
Remember to tag me on Instagram (do it on the photo, not in the caption! This way I won’t miss it) with @chiaramazzetti.art and put the hashtag #chiaramazzettitutorial, i’d love to see what you create!
Happy painting!
Chiara
List of watercolors (based on the brand i used for this painting: White Nights Nevskaya Palitra)