


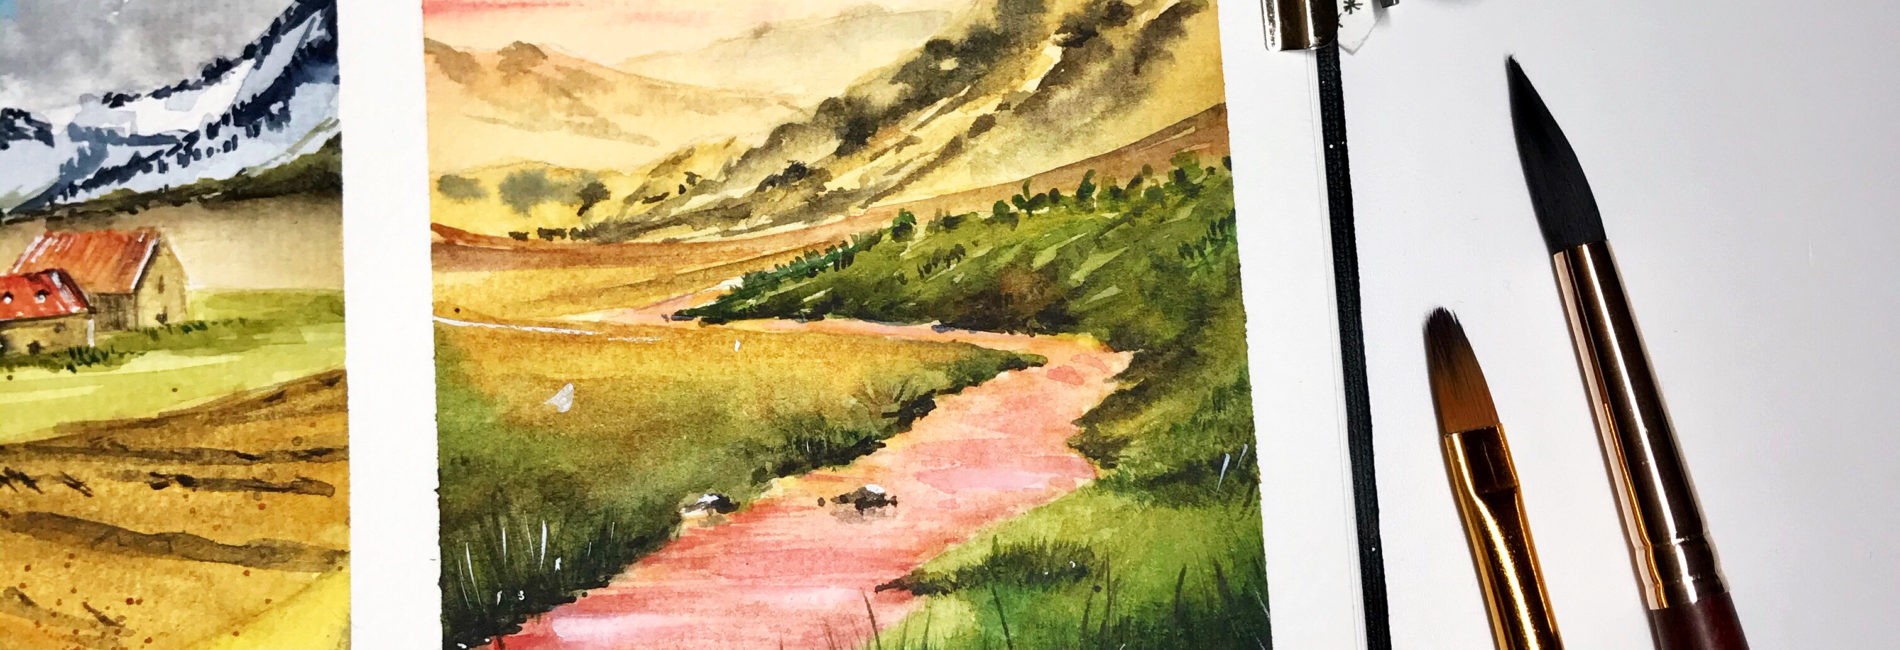
In this guide I will go through all the steps to paint a mountain scene in watercolor. Join me in this fun tutorial and let me know what you think in the comments!
Supplies
You will need:
1 – The Sketch
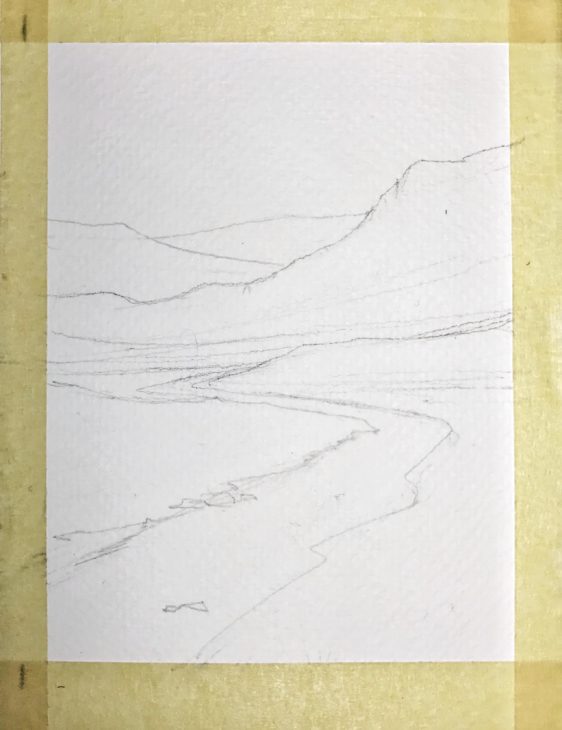
- Put the masking tape around your painting area.
- Draw the mountains and the stream with the pencil. Keep in mind the perspective: it has to be wider in the foreground and smaller in the background.
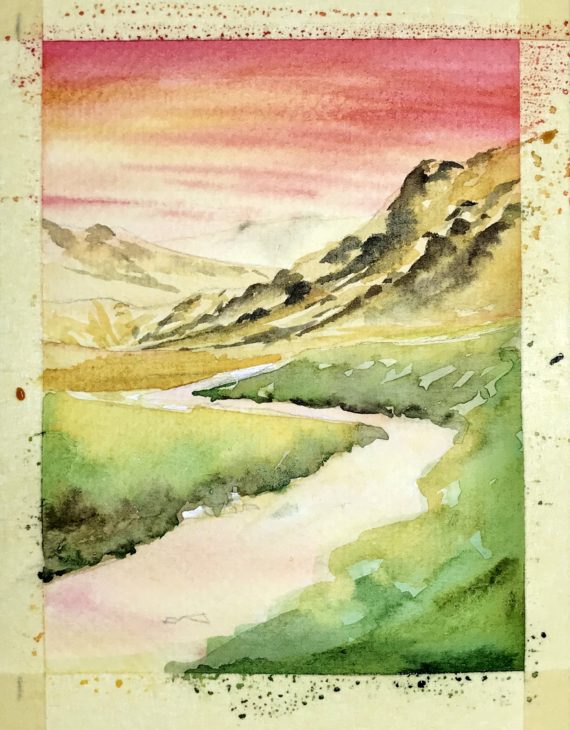
2 – First Layer

- Prepare Indian Gold, Cadmium Yellow and Quin. Violet Rose on a mixing surface.
- Wet the sky area with the brush n°10 and start with the lightest color (yellow), next the orange one (Indian Gold) and then end with Quin. Violet Rose. Let the yellow run over the top of the mountains.
- Go on the mountains with Indian Gold.
- Continue on the ground with Olive Green and Indian Gold for the brightest parts and add some dark spots with Sepia and Green in the foreground.
- Wait for the rest to dry up a little and then wet the stream area and mimic the sky. This time with more water but obviously using the same colors.
- Let dry
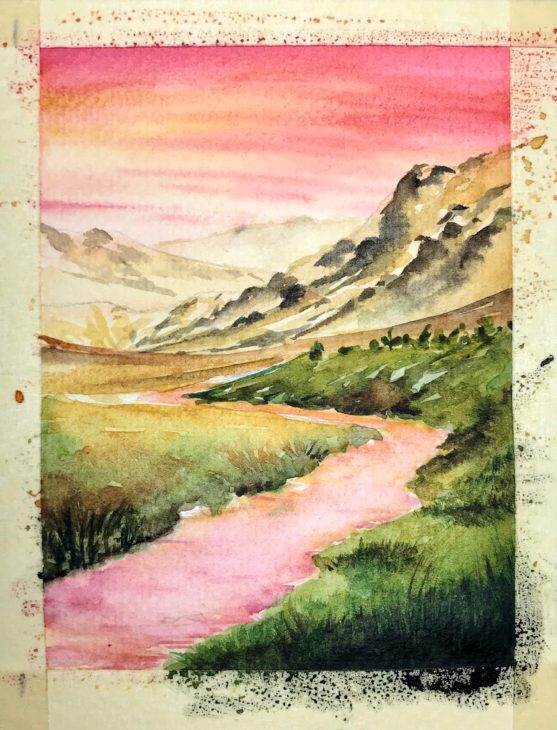
3 – Second Layer
- Use the Filbert Brush and proceed with Indian Gold and Sepia to define the mountains. Put more saturated color on the first one and leave the other two with less details.
- Take now the round brush number 8 and define the ground with Indian Gold and Olive Green with some dark spots near the shore of the stream made with Sepia and Green.
- Don’t touch the stream for now and let dry.
4 – Third Layer
- Again define the ground with brush number 8 adding some greenery here and there.
- Take the Filbert Comb brush or a number 4 round brush and start to paint the foreground grass with Green and a little touch of Sepia.
- Add some stripes of Quin. Violet Rose on the stream with the brush number 4 to simulate ripples and to add more life to the stream.
5 – Details
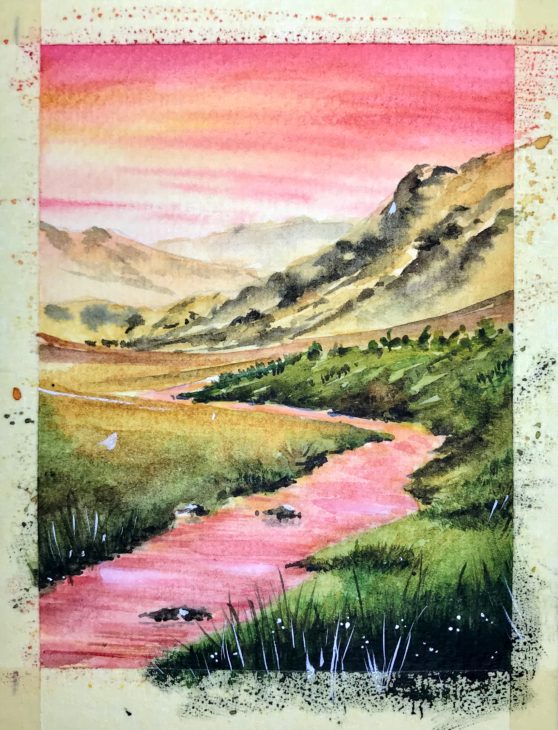
- For the smallest details as rocks, ripples and small tufts of grass use the brush number 4.
- With the same brush, add some contrast in the darkest part of the foreground by adding stripes and dots of white.
- Now take the fountain pen and add some dark spots here and there but mostly on the shore of the stream
Final Result

- Remove the masking tape and admire the result!
- If you want, you can sign the paint. I added some of the colors used on the bottom of the painting, to give it a personal touch.
If you try this painting remember to tag me on Instagram (do it on the photo, not in the caption! This way i won’t miss it) with @chiaramazzetti.art and put the hashtag #chiaramazzettitutorial, i’d love to see what you create!
Happy painting!
Chiara
List of watercolor names (based on the brand i used for this painting: White Nights Nevskaya Palitra):
Patty
Thanks for the tutorial, Chiara! I’m a beginning student of watercolor, so I appreciate these tutorials so much!
Chiara Mazzetti
Hi Patty! I’m very happy to hear that!! Keep practicing <3